


 曼巴out ·
Netty ByteBuf 几种类型
1. 前言
上一节,我们主要学习了 ByteBuf 的核心 API,相信大家都能掌握,本节主要介绍 ByteBuf 的几种分类。
2. 创建一个 ByteBuf
常见创建 ByteBuf 主要有两种方式,分别如下所示:
方式一:
ByteBuf byteBuf = ByteBufAllocator.DEFAULT.buffer(10);
方式二:
ByteBuf byteBuf = Unpooled.buffer(10);
思考:那么这两种方式有什么关联呢?
Unpooled.buffer 源码,以下代码是经过整理,只保留了核心代码。
public final class Unpooled {
    private static final ByteBufAllocator ALLOC;

    static {
        ALLOC = UnpooledByteBufAllocator.DEFAULT;
    }

    public static ByteBuf buffer(int initialCapacity) {
        return ALLOC.heapBuffer(initialCapacity);
    }

    public static ByteBuf directBuffer() {
        return ALLOC.directBuffer();
    }
}
通过源码,我们可以知道,其实 Unpooled 工具类也是调用 ByteBufAllocator 去创建 ByteBuf 的。从字面上我们能够大概猜到它针对的是非池化的 ByteBuf 进行创建的。
3. ByteBuf 分类
ByteBuf 是一个字节容器,底层是根据容量值来申请一块内存区域来存储字节数组的。既然涉及到内存,那么会分为直接内存和 JVM 内存,这个和 NIO 的直接缓冲器和非直接缓冲器是一样的道理。直接内存,速度很快,垃圾回收是不受 JVM 控制,容易造成内存爆满。
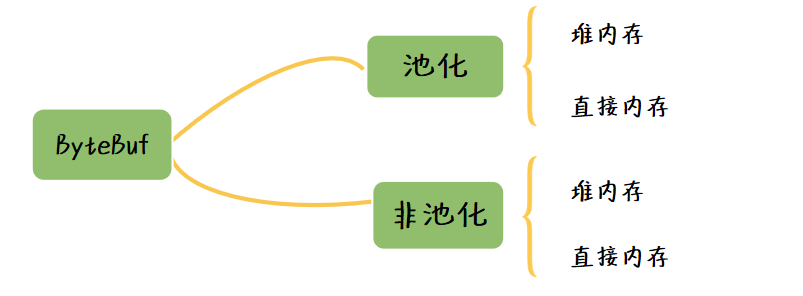
ByteBuf 主要分为三种类型
- Pooled 和 Unpooled,池化和非池化;
- Heap 和 Direct,堆内存和直接内存;
- Safe 和 Unsafe,安全和非安全。
池化和非池化: 池化就是用完就放回池子里面,比如我们所熟悉的数据库连接池。非池化就是每次使用都重新创建,使用完成则立马销毁。从性能的角度来说,池化会比非池化相对高,因为可以重复利用,避免每次都重新创建。
堆内存和直接内存: 堆内存是 JVM 内部开辟的一块内存空间,它的生命周期受到 JVM 来管理,不容易造成内存溢出的情况。直接内存则是直接受操作系统管理了,如果数据量很大的情况,容易造成内存溢出情况。
安全和非安全: 主要是 Java 操作底层操作数据的一种安全和非安全的方式。
根据不同类型进行组合,得到常见 ByteBuf 的实现类
- 池化 + 堆内存,PooledHeapByteBuf;
- 池化 + 直接内存,PooledDirectByteBuf;
- 池化 + 堆内存 + 不安全,PooledUnsafeHeapByteBuf;
- 池化 + 直接内存 + 不安全,PooledUnsafeDirectByteBuf;
- 非池化 + 堆内存,UnpooledHeapByteBuf;
- 非池化 + 直接内存,UnpooledDirectByteBuf;
- 非池化 + 堆内存 + 不安全,UnpooledUnsafeHeapByteBuf;
- 非池化 + 直接内存 + 不安全,UnpooledUnsafeDirectByteBuf。
4. ByteBufAllocator 的使用
由于 ByteBuf 的组合种类非常的多,如果让用户手工去创建的化,会非常的麻烦,并且对每种类型不熟悉,很容易出现性能问题。这点跟 Java 线程池有点类似,线程池的种类分好几种,但是通常都是通过 Executors 工具类来进行线程池的创建。
其中,ByteBufAllocator 又主要分为两种,分别是 UnpooledByteBufAllocator 和 PooledByteBufAllocator。其实,一般情况下我们不需要直接使用具体的分配器,而是使用它默认的即可。
4.1 默认分配 - 池化 & 非池化
实例:
ByteBufAllocator byteBufAllocator = ByteBufAllocator.DEFAULT;
源码:
public interface ByteBufAllocator {
    ByteBufAllocator DEFAULT = ByteBufUtil.DEFAULT_ALLOCATOR;
}
源码:以下源码是经过处理,只保留核心部分。
public final class ByteBufUtil {
    static final ByteBufAllocator DEFAULT_ALLOCATOR;
    static {
        //1.分配类型
        String allocType = SystemPropertyUtil.get("io.netty.allocator.type", PlatformDependent.isAndroid() ? "unpooled" : "pooled");

        //2.根据类型,创建不同的分配器
        Object alloc;
        if ("unpooled".equals(allocType)) {
            alloc = UnpooledByteBufAllocator.DEFAULT;

        } else if ("pooled".equals(allocType)) {
            alloc = PooledByteBufAllocator.DEFAULT;

        } else {
            alloc = PooledByteBufAllocator.DEFAULT;
        }

        DEFAULT_ALLOCATOR = (ByteBufAllocator)alloc;
    }
}
根据以上的源码,我们可以知道,使用 ByteBufAlloctor 来创建 ByteBuf 时,会判断使用池化还是非池化的分配器。
4.2 默认分配 - 堆内存 & 直接内存
实例:
ByteBuf byteBuf = ByteBufAllocator.DEFAULT.buffer(10);
源码:以下源码是经过处理,只保留核心部分。
public abstract class AbstractByteBufAllocator implements ByteBufAllocator {
    private final boolean directByDefault;

    //构造函数
    protected AbstractByteBufAllocator(boolean preferDirect) {
        this.directByDefault = preferDirect && PlatformDependent.hasUnsafe();
    }

    public ByteBuf buffer(int initialCapacity) {
        return this.directByDefault ? this.directBuffer(initialCapacity) : this.heapBuffer(initialCapacity);
    }
}
通过 directByDefault 来判断是否选择创建堆内存还是直接内存的 ByteBuf,而 directByDefault 是在构造函数里面进行传值的,那么它是一个抽象类,因此肯定是从其子类的构造函数传值进来。
继续查看源码:
public class PooledByteBufAllocator extends AbstractByteBufAllocator {
    public PooledByteBufAllocator() {
        //传递的是false
        this(false);
    }
}

public final class UnpooledByteBufAllocator extends AbstractByteBufAllocator {
    public UnpooledByteBufAllocator(boolean preferDirect) {
        this(preferDirect, false);
    }

    public UnpooledByteBufAllocator(boolean preferDirect, boolean disableLeakDetector) {
        //传递值给父类的构造函数
        super(preferDirect);
        this.disableLeakDetector = disableLeakDetector;
    }
}
总结,ByteBufAllocator 的核心两个步骤分别如下:
- 确定是使用哪个分配器,池化还是非池化?
UnpooledByteBufAllocator和PooledByteBufAllocator; - 再确定是堆内存还是直接内存,主要是在
UnpooledByteBufAllocator和PooledByteBufAllocator的构造函数里面传值确定。
4.3 核心方法
| 方式 | 描述 |
|---|---|
| buffer(); | 创建 ByteBuf(堆内存还是直接内存?),默认容量值 |
| buffer(int var1); | 创建 ByteBuf(堆内存还是直接内存?),手工指定容量值 |
| buffer(int var1, int var2); | 创建 ByteBuf(堆内存还是直接内存?),手工指定容量值和最大容量值 |
| heapBuffer(); | 创建一个堆内存的 ByteBuf,默认容量值 |
| heapBuffer(int var1); | 创建一个堆内存的 ByteBuf,手工指定容量值 |
| heapBuffer(int var1, int var2); | 创建一个堆内存的 ByteBuf,手工指定容量值和最大容量值 |
| directBuffer(); | 创建一个直接内存的 ByteBuf,默认容量值 |
| directBuffer(int var1); | 创建一个直接内存的 ByteBuf,手工指定容量值 |
| directBuffer(int var1, int var2); | 创建一个直接内存的 ByteBuf,手工指定容量值和最大容量值 |
一般推荐使用 buffer ()、buffer(int var1)、buffer(int var1,int var2),因为 Netty 底层回去帮选择创建最优的 ByteBuf。
5. Unpooled 的使用
Unpooled 主要是使用了非池化技术,可以创建堆内存和直接内存的 ByteBuf。
核心 API 如下所示:
| 方法 | 描述 |
|---|---|
| ByteBuf buffer() | 创建非池化 + 堆内存的 ByteBuf,默认容量大小 |
| ByteBuf buffer(int initialCapacity) | 创建非池化 + 堆内存的 ByteBuf,并且可以指定容量大小 |
| ByteBuf directBuffer() | 创建非池化 + 直接内存的 ByteBuf,默认容量大小 |
| directBuffer(int initialCapacity) | 创建非池化 + 直接内存的 ByteBuf,并且可以指定容量大小 |
| ByteBuf copiedBuffer(byte[] array) | 创建非池化 + 堆内存的 ByteBuf,并且初始化字节数组 |
| ByteBuf copiedBuffer(byte[] array, int offset, int length) | 创建非池化 + 堆内存的 ByteBuf,并且把字节数组的部分内容初始化到 ByteBuf |
| ByteBuf copiedBuffer(ByteBuf buffer) | 创建非池化 + 堆内存的 ByteBuf,并且把参数的 ByteBuf 写入到新创建的 ByteBuf 里 |
以上的方法是平时我们使用 Unpooled 时使用最多的,难度不大,只需要分清每个方法的作用是什么即可,可以根据自己需求选择合适的 ByteBuf 类型。
6. 小结
本节主要介绍了 ByteBuf 的几种核心类型以及创建 ByteBuf 的几种方式
- 掌握 ByteBuf 的三种类型,分别是池化与非池化、堆内存与直接内存、安全与不安全,以及它们之间的含义;
- ByteBufAllocator 分配器,它是如何去创建 ByteBuf 的,几种模式;
- Unpooled,Netty 提供的非池化工具类。

 2026 imooc.com All Rights Reserved |