-
Spring相关知识
第一章 概述
1-1 Spring入门课程简介
SpringFrameWork
1-2 Spring概况
1.一个轻量的控制反转(IoC)和面向切面(AOP)的容器框架
(1)从大小和开销两方面而言,Spring是轻量的
(2)通过控制反转达到松耦合的目的
(3)提供面向切面编程的丰富支持,允许通过分离应用的业务逻辑(如商品的入库)与系统级服务(如日志记录)进行内聚性的开发
(4)包含并管理应用对象的配置和生命周期,这个意义上是一种容器(容器:用来管理对象)
(5)将简单的组件配置、组合成为复杂的应用,这个意义上是框架(框架:半成品,支持其他组件的组合)
2.Spring作用
容器、提供对多种技术的支持、AOP(事务管理、日志)、提供了众多方便应用的辅助类(JDBC 模板等)、对主流应用框架(MyBatis)提供了良好的支持
3.适应范围
(1)构建企业应用(SpringMVC+Spring+MyBatis)
(2)单独使用Bean容器进行管理
(3)单独使用AOP进行切面处理
(4)其他的Spring功能,如:对消息的支持
(5)在互联网中的应用
1-3 Spring框架
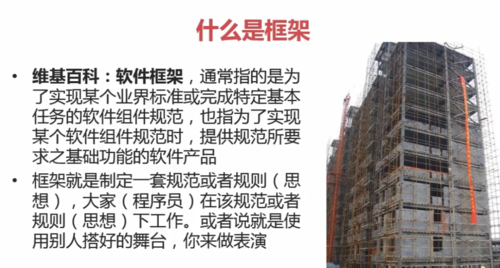
1.框架
(1)定义:一套规范或规则,程序员在该规范或规则下工作
(2)特性:半成品,封装了特定的处理流程和控制逻辑,成熟的、不断升级改进的软件
(3)与类库的区别:框架一般是封装了逻辑、高内聚的,类库则是松散的工具组合;框架专注于某一领域,类库则是更通用的
(4)为什么使用框架:软件系统日趋复杂;重用度高,开发效率和质量提高;软件设计人员要专注于对领域的了解,使需求分析更充分;易于上手、快速解决问题
第二章 Spring IoC容器
2-1 IoC及Bean容器
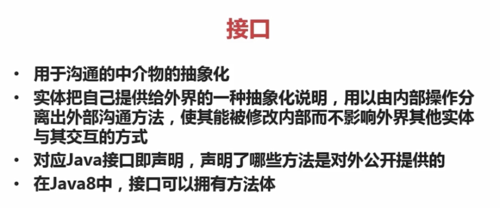
1.接口
用于沟通的中介物(规范)的抽象化
对外提供一些功能,内部的实现不公开
Java中,接口即声明,声明了哪些方法是对外公开提供的
Java8中,接口可以有方法体
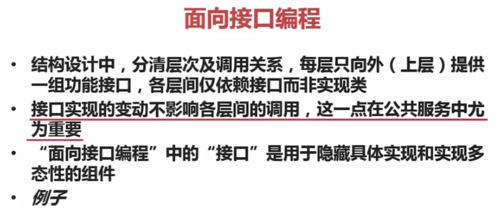
2.面向接口编程
结构设计中,分清层次及调用关系,每层只向外(上层)提供一组功能接口,各层间仅依赖接口而非实现类
接口实现的变动不影响各层间的调用,这一点在公共服务中尤为重要
“面向接口编程”中的“接口”是用于隐层具体实现和实现多态性的组件
例子:
接口Dao,实现类DaoImpl,使用方法为多态Dao dao = new DaoImpl();用接口声明,将接口的实现类赋值给接口,最后调方法
3.IoC
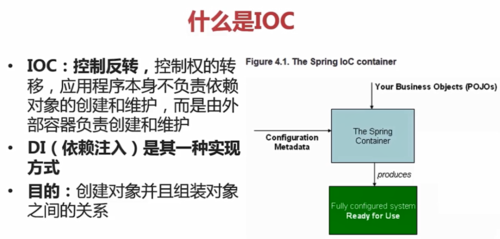
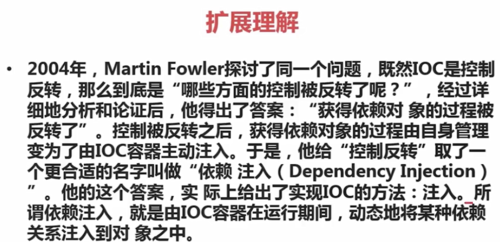
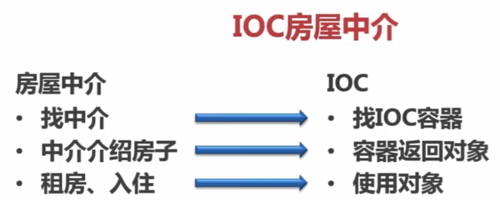
IoC:控制反转,控制权的转移,应用程序本身不负责依赖对象的创建和维护,而是由外部容器负责创建和维护(住房子不是自己来建,而是找中介——中介找房子——住中介找的房子,即IoC的动作:找IoC容器——容器返回对象——使用对象)
DI:依赖注入,是IoC的一种实现方式,目的是创建对象并组装对象之间的关系
IoC中,所有的容器称为Bean
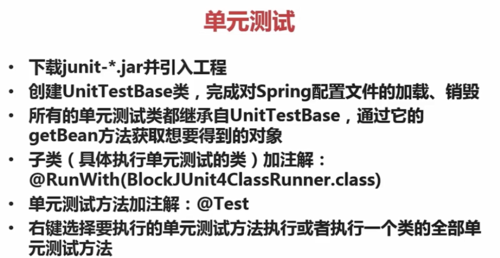
4.Bean容器的初始化
(1)基础:两个包org.springframework.beans和org.springframeword.context
BeanFactory提供配置结构和基本功能,加载并初始化Bean
ApplicationContext是BeanFactory的子接口,保存了Bean对象并在Spring中被广泛使用
他们都可以代表Spring容器,Spring容器是生成Bean实例的工厂,并管理Bean
在创建Spring容器的实例时(通过getBean方法),必须提供Spring容器管理的Bean的详细配置信息,Spring的配置信息通常通过xml配置文件来设置(也可通过注解)。
在实际的应用中,Spring容器通常是采用声明式方式配置产生:即开发者只要在web.xml文件中配置一个Listener,该Listener将会负责初始化Spring容器。
实现BeanFactoryAware接口的Bean实例,拥有访问BeanFactory容器的能力
就是说,ApplicationContext用来管理Bean,可以通过xml配置文件或注解的方式来将Bean注册到ApplicationContext中
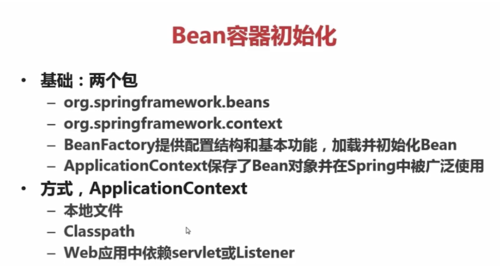
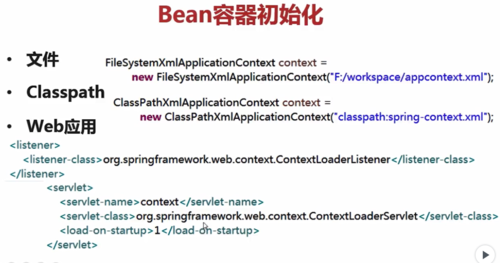
(2)初始化ApplicationContext的方式
1°本地文件
FileSystemXmlApplicationContext context = new FileSystemXmlApplicationContext("F:/workspace/ applicationContext.xml");
2°Classpath
ClassPathXmlApplicationContext context = new ClassPathXmlApplicationContext("classpath:applicationContext.xml");
3°Web应用中依赖servlet或Listener
a.
<listener>
<listener-class>org.springframework.web.context.ContextLoaderListener<listener-class>
<listener>
b.
<servlet>
<servlet-name>context<servlet-name>
<servlet-class>org.springframework.web.context.ContextLoaderServlet<servlet-class>
<load-on-startup>1<load-on-startup>
<servlet>
2-2 Spring注入方式
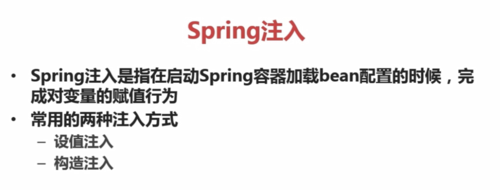
1.指在启动Spring容器加载bean配置的时候,完成对变量的赋值行为
常用的两种注入方式:
设值注入
构造注入
2.设值注入(即调用set方法,需要在InjectionServiceImpl类中提供set方法来获取InjectionDAO的对象)
<bean id="injectionService" class="com.imooc.injection.serivec.InjectionServiceImpl">
<property name="injectionDAO" ref="injectionDAO"/>
或<property name="injectionDAO" ref="injectionDAO"></property>
</bean>
<bean id="injectionDAO" class="com.imooc.ioc.injection.dao.InjectionDAOImpl"></bean>
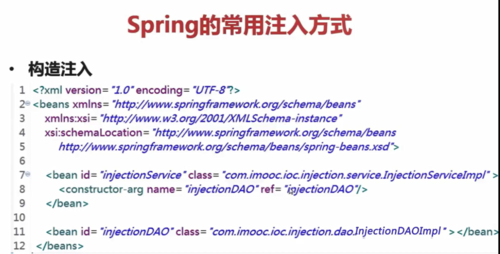
3.构造注入(即调用构造方法,需要在InjectionServiceImpl类中提供构造方法来获取InjectionDAO的对象)
<bean id="injectionService" class="com.imooc.injection.serivec.InjectionServiceImpl">
<constructor-arg name="injectionDAO" ref="injectionDAO"/>
<constructor-arg name="injectionDAO" ref="injectionDAO"></constructor-arg>
</bean>
<bean id="injectionDAO" class="com.imooc.ioc.injection.dao.InjectionDAOImpl"></bean>
第三章 Spring Bean装配(上)
主要部分:
Bean配置项
Bean的作用域
Bean的生命周期
Bean的自动装配
Resource和ResourceLoader
Bean的注解方式(对以上内容用注解方式进行改进)
3-1 Spring Bean装配之Bean的配置项和作用域
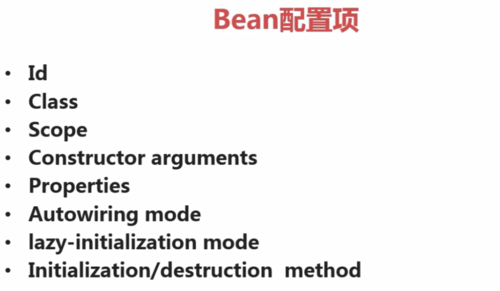
1.Bean的配置项
(1)Id:Bean的唯一标识
(2)Class:具体要实例化的类
(3)Scope:作用域(范围)
(4)Constructor arguments:构造器参数
(5)Properties:属性
(6)Autowiring mode:自动装配模式
(7)lazy-initialization mode:懒加载模式
(8)Initialization/destruction method:初始化/销毁方法
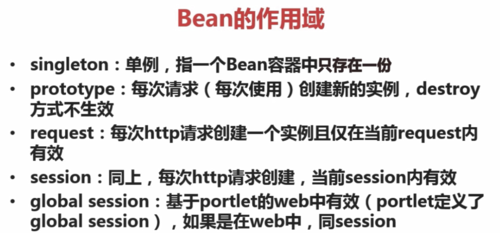
2.Bean的作用域
(1)singleton:(默认作用域)单例,指一个Bean容器中只存在一份
(2)prototype:每次请求(每次使用)创建新的实例,destory方法不生效(因为会自动回收)
(3)request:每次http请求创建一个实例且仅在当前request内有效
(4)session:同上,每次http请求创建,当前session内有效(session在一个会话周期有效)
(5)global session:基于portlet的web中有效(protlet定义了global session),如果是在web中,同session(假如有多个系统,global session跨越多个session)
3-2 Spring Bean装配之Bean的生命周期
1.Bean的生命周期
定义
初始化
使用
销毁
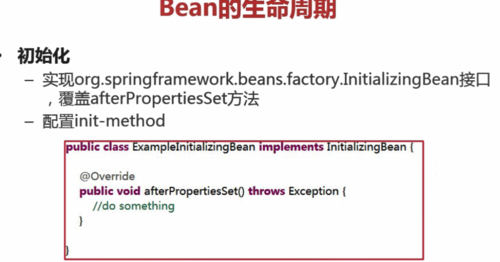
2.单一Bean初始化的两种方式
(1)实现org.springframework.beans.factory.InitializingBean接口,覆盖afterPropertiesSet方法
public class ExampleInitializingBean implements IntializingBean {
@Override
public void afterPropertiesSet() throws Exception {
//do something
}
}
(2)配置init-method
<bean id="exampleInitBean" class="examples.ExampleBean" init-method="init"/>
public class ExampleBean {
public void init() {
//do some initialization work
}
}
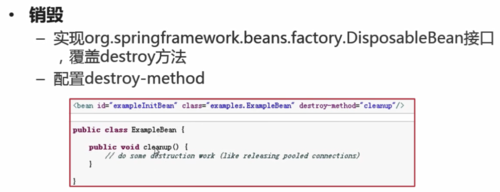
3.单一Bean销毁的两种方式
(1)实现org.springframework.beans.factory.DisposableBean接口,覆盖destory方法
public class ExampleDisposableBean implements DisposableBean {
@Override
public void destory() throws Exception {
//do something
}
}
(2)配置destory-method
<bean id="exampleInitBean" class="examples.ExampleBean" destory-method="cleanup"/>
public class ExampleBean {
public void cleanup() {
//do some destructiono work (like relesing polled connections)
}
}
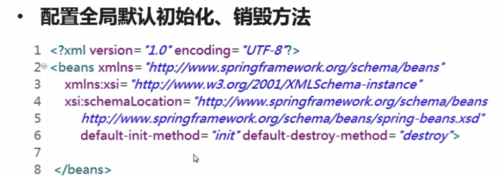
4.配置全局默认的初始化、销毁方法(所有Bean都会调用)
在Bean的配置文件的最外层(最上层),紧接着xmlns(XML的命名空间)和xsi:schemaLocation后面,添加
default-init-method="init" default-destory-method="destory">
5. 优先级
实现接口的方式>配置init-method和destory-method的方式
如果配置了单一Bean的初始化/销毁方式,那么全局默认的初始化/销毁方式不会生效
3-3 Spring Bean装配之Aware接口
1.Aware
(1)Spring中提供了一些以Aware结尾的接口,实现了Aware接口的Bean在被初始化之后,可以获取相应资源
(2)通过Aware接口,可以对Spring相应资源进行操作(一定要慎重)
(3)为对Spring进行简单的扩展提供了方便的入口
如:ApplicationContextAware、BeanNameAware
Day45(8.13)
3-4 Spring Bean装配之自动装配(Autowiring,即自动注入)
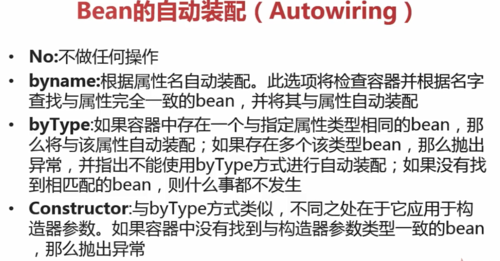
1.自动装配的类型
(1)No:不做任何操作
(2)byname:根据属性名自动装配。此选项将检查容器并根据名字查找与属性完全一致的bean,并将其与属性自动装配
(3)byType:如果容器中存在一个与指定属性类型相同的bean,那么将与该属性自动装配;如果存在多个该类型bean,那么抛出异常,并指出不能使用byType方式进行自动装配;如果没有找到相匹配的bean,则什么事都不发生
(4)Constructor:与byType方式类似,不同之处在于他应用于构造器参数。如果容器中没有找到与构造器参数类型一致的bean,那么抛出异常
2.个人理解
这种方式是:对于一个需要注入的bean,不需要在它的bean中添加property或constructor-arg配置(手动注入),而是在xml配置文件中设置autowire来实现自动注入,自动调用setter方法或构造方法(注意,仍然需要setter方法或构造方法),如:
原来是:
<?xml version="1.0" encoding="UTF-8"?>
<beans xmlns=…
…>
<bean id="injectionService" class="com.imooc.injection.serivec.InjectionServiceImpl">
<property name="injectionDAO" ref="injectionDAO"/>
</bean>
<bean id="injectionDAO" class="com.imooc.ioc.injection.dao.InjectionDAOImpl"></bean>
现在是:
<?xml version="1.0" encoding="UTF-8"?>
<beans xmlns=…
…
default-autowire="byName">
<bean id="injectionService" class="com.imooc.injection.serivec.InjectionServiceImpl"></bean>
<bean id="injectionDAO" class="com.imooc.ioc.injection.dao.InjectionDAOImpl"></bean>
3-5 Spring Bean装配之Resources
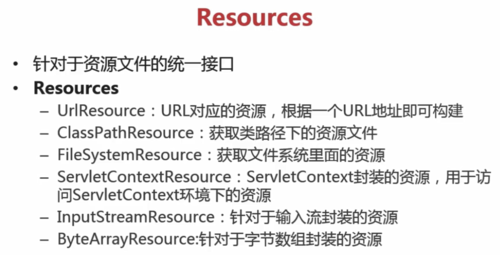
1.针对于资源文件的统一接口(获取资源文件)
2.Resources的类型
(1)UrlResource:URL对应的资源,根据一个URL地址既可创建
(2)ClassPathResource:获取类路径下的资源文件
(3)FileSystemResource:获取文件系统里面的资源
(4)ServletContextResource:ServletContext封装的资源,用于访问ServletContext环境下的资源
(5)InputStreamResource:针对于输入流封装的资源
(6)ByteArrayResource:针对于字节数组封装的资源
3.Resources的加载类ResourceLoader
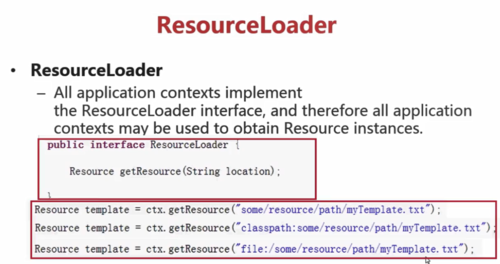
所有application context都实现了ResourceLoader接口,所以都可以用来获取Resource实例
获取Resource对象举例:
(可以通过实现ApplicationContextAware接口)在获取applicationContext对象后,就可以获取资源
Resource template = applicationContext.getResource("some/resource/path/myTemplate.txt");
Resource template = applicationContext.getResource("classpath:some/resource/path/myTemplate.txt");
Resource template = applicationContext.getResource("file:/some/resource/path/myTemplate.txt");
4.ResourceLoader的前缀
前缀 例子
classpath: classpath:com/myapp/config.xml
file: file:/data/config.xml
http: http://myserver/logo.png
(none): /data/config.xml(此时依赖于ApplicationContext所依赖的,例如如果是classpath就是classpath)
第四章 Spring Bean装配(下)
4-1 Spring Bean装配之Bean的定义及作用域的注解实现
1.Classpath扫描与组件管理
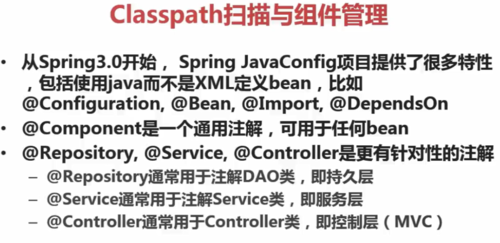
(1)从Spring3.0开始,Spring JavaConfig项目提供了很多特性,包括使用java而不是xml定义bean,比如@Configuration、@Bean、@Import、@DependsOn
(2)Component是一个通用注解,可用于任何bean
(3)Repository、@Service、@Controller是更有针对性的注解
@Repository通常用于注解DAO类,即持久层
@Service通常用于注解Service类,即服务层
@Controller通常用于注解Controller类,即控制层(MVC)
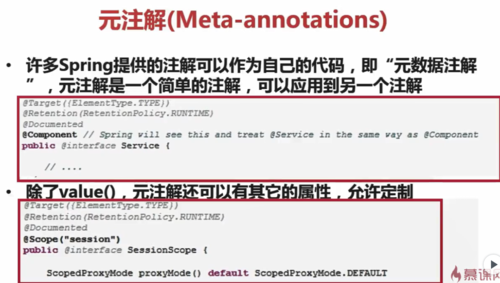
2.元注解
即注解的注解,如:
@Component
public @interface Service {
//…
}
对于Service这个注解,可以用Component注解进行注解
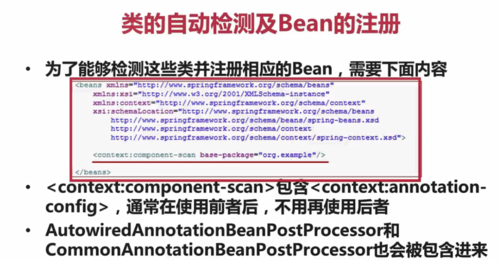
3.类的自动检测及Bean的注册
Spring可以自动检测类并注册Bean到ApplicationContext中(通过注解的方式)
4.<context:annotation-config/>
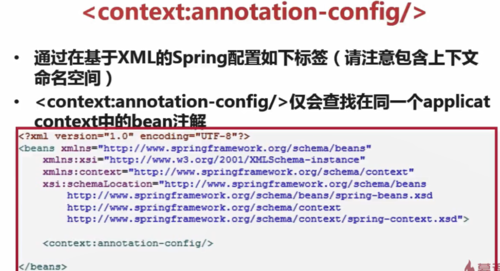
通过在基于xml的Spring配置如下标签(请注意:在头文件中加上该标签,会同时自动加入context命名空间)
<context:annotation-config/>,;仅会查找在同一个applicationContext中的bean注解
5.类的自动检测及Bean的注册
(1)为了检测类并注册相应的Bean,需要在文件头中的下面添加一行(component-scan即对注解进行扫描,如果扫描到注解对应的类,将该类注册到容器上;base-package是扫描该包下的类):
<context:component-scan base-package="com.service"/>
(2)<context:component-scan>包含<context:annotation-config>,通常在使用前者后,不用再使用后者(前者对类和类内的注解进行扫描,后者只对类内的方法或成员变量的注解进行扫描)
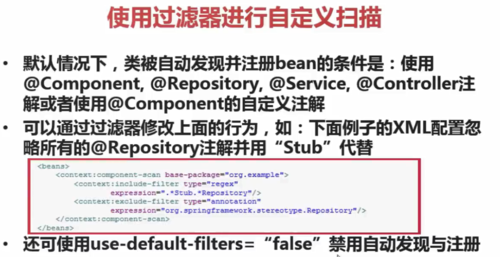
6.使用过滤器进行自定义扫描
(1)默认情况下,类被自动发现并注册bean的条件是:使用@Component、@Repository、@Service、@Controller注解或使用@Component的自定义注解
(2)可以通过过滤器修改上面的自动发现行为,如:
<beans>
<context:component-scan base-package="org.example">
<context:include-filter type="regex"
expression=".*Stub.*Repository"/>
<context:exclude-filter type="annotation"
expression="org.springframework.stereotype.Repository"/>
</context:component-scan>
</beans>
本例的xml配置忽略所有的@Repository注解并寻找所有使用"Stub"注解的类
(3)还可以使用use-default-filters="false"禁止自动发现与注册
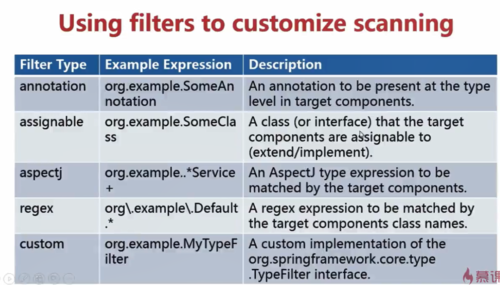
7.过滤器的类型
annotation、assignable、aspectj、regex、custom
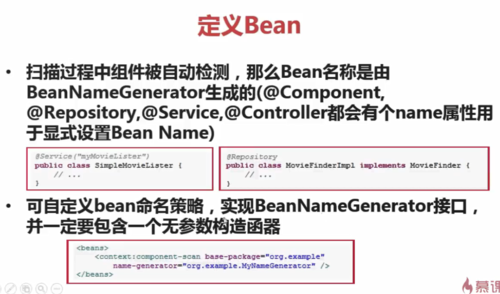
8.如何自定义Bean
(1)扫描过程中组件被自动检测,那么Bean名称是由BeanNameGenerator生成的(@Component、@Repository、@Service、@Controller都会有个name属性用来显示设置Bean Name),如果不显式指定name,则用默认生成的(默认为首字母小写的类名),如:
@Service("myMovieListener")
public class SimpleMovieListener {
//…
}
和
@Service() //此处的name默认为simpleMovieListener
public class SimpleMovieListener {
//…
}
此处的名称相当于xml配置文件中的id
(2)可以自定义Bean的默认命名策略,如:
<beans>
<context:component-scan base-package="org.example"
name-generator="org.example.MyNameGenerator"/>
</beans>
要实现BeanNameGenerator接口,并一定要包含一个无参构造器,
9.作用域(Scope)
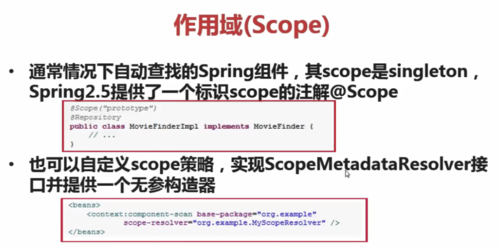
(1)通常情况下自动查找的Spring组件,其scope是singleton,Spring2.5提供了一个标识scope的注解@Scope
@Scope("prototype")
@Repository
public class MovieFinderImpl implements MovieFinder {
//…
}
(2)也可以自定义scope策略,如
<beans>
<context:component-scan base-package="org.example"
scope-resolver="org.example.MyScopeResolver"/>
</beans>
要实现ScopeMetadataResolver接口并提供一个无参构造器
10.代理方式(代理即代理网络用户去取得网络信息)
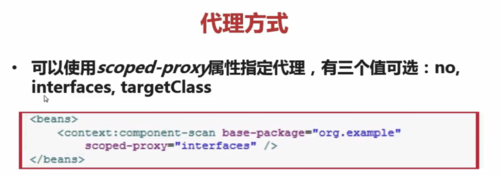
可以使用scoped-proxy属性指定代理,有三个值可选:no、interfaces、targetClass(目标类),如:
<beans>
<context:component-scan base-package="org.example"
scoped-proxy="interfaces"/>
</beans>
4-2 Spring Bean装配之Autowired注解说明-1
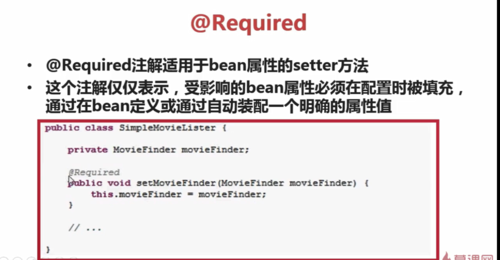
1.@Required
(1)Required注解适用于bean属性的setter方法
(2)这个注解仅仅标识,受影响的bean属性必须在配置时被填充,通过在bean定义或通过自动装配一个明确的属性值如:
public class SimpleMovieListener {
private MovieFinder movieFinder;
@Required
public void setMovieFinder(MovieFinder movieFinder) {
this.movieFinder = movieFinder;
}
//…
}
2.@Autowired(不需要在xml中使用autowire属性,添加注解即可实现自动注入)
个人理解:在A类的方法中需要B类的对象,要通过注入的方式实现,最普通的方式是在xml中添加配置,也可以在xml中设置autowire属性来自动注入,还可以用添加注解的方式来自动注入
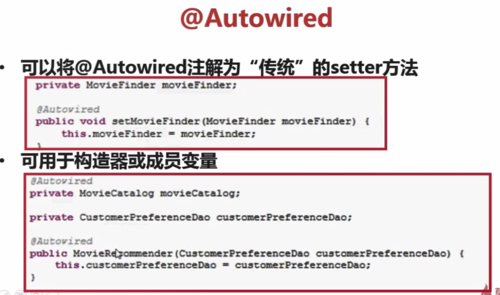
(1)可以将@Autowired注解理解为“传统”的setter方法,如:
private MovieFinder movieFinder;
@Autowired
public void setMovieFinder(MovieFinder movieFinder) {
this.movieFinder = movieFinder;
}
(2)也可以用于构造器或成员变量,如:
@Autowired
private MovieCatalog movieCatalog;
private CustomerPreferenceDao customerPerferenceDao;
@Autowired
public MovieRecommender(CustomerPreferenceDao customerPreferenceDao) {
this. customerPreferenceDao = customerPreferenceDao;
}
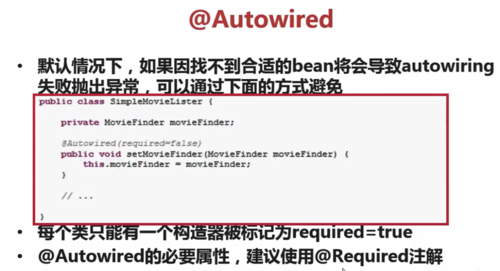
(3)默认情况下,如果找不到合适的bean,将会导致autowiring失败并抛出异常,可以通过下面的方式避免:
public class SimpleMovieListener {
private MovieFinder movieFinder;
@Autowired(required=false)
public void setMovieFinder(MovieFinder movieFinder) {
this.movieFinder = movieFinder;
}
//…
}
注意:
1°每一个类只能有一个构造器被标记为required=true
2°@Autowired的必要属性,建议使用@Required来注解
4-3 Spring Bean装配之Autowired注解说明-2
1.@Autowired
(1)可以使用@Autowired注解那些众所周知的解析依赖性接口,比如:BeanFactory, ApplicationContext, Environment, ResourceLoader, ApplicationEventPublisher, MessageSource,例:
public class MovieRecommender {
@Autowired
private ApplicationContext context;
public MovieRecommender() {
}
//…
}
通过注解,可以得到ApplicationContext并使用
(2)可以通过添加注解给需要该类型的数组的字段或方法,以提供ApplicationContext中的所有的特定类型的bean,
1°可以用于装配Set,如:
private Set<MovieCatalog> movieCatalogs;
@Autowired
public void setMovieCatalogs(Set<MovieCatalog> movieCatalogs) {
this. movieCatalogs = movieCatalogs;
}
通过@Autowired注解后,ApplicationContext中的所有符合Set的泛型声明的bean或其子类将会放到Set中去
2°可以用于装配key为String的Map(key即所有Bean的id,value即Bean的对象),如:
private Map<String, MovieCatalog> movieCatalogs;
@Autowired
public void setMovieCatalogs(Map<String, MovieCatalog> movieCatalogs) {
this. movieCatalogs = movieCatalogs;
}
3°如果希望list数组有序,可以让bean实现org.springframe.core.Ordered接口或使用@Order注解
如:@Order(value=1)对应的bean,排在@Order(value=2)对应的bean之前
(3)注意:
@Autowired注解是由Spring BeanPostProcessor处理的,所以不能在自己的BeanPostProcessor或BeanFactoryPostProcessor类型中应用这些注解,这些类型必须通过xml或Spring的@Bean注解加载
(4)例子
定义一个接口和他的两个实现类,都用@Component进行注解(来让Spring发现并注册为bean),然后定义一个list<接口>并用@Autowired进行注解,这样就可以将这两个实现类注入到list中
4-4 Spring Bean装配之Autowired注解说明-3
1.@Qualifier
(1)定义
按类型自动装配时,可能有多个bean实例的情况,这时可以使用Spring的@Qualifier注解来缩小范围(或指定唯一),也可以用于指定单独的构造器或方法参数
可以用于注解集合类型变量
(2)使用举例
1°用于成员变量
对成员变量用@Qualifier进行注解,当有多个MovieCatalog想自动注入到bean时,只将id为main的注入到bean
public class MovieRecommender {
@Autowired
@Qualifier("main")
private MovieCatalog movieCatalog;
}
2°用在方法中(最常用)
@public void prepare(@Qualifier("main") MovieCatalog movieCatalog, CustomerPreferenceDao customerPreferenceDao) {
this.movieCatalog = movieCatalog;
this.customerPreferenceDao = customerPreferenceDao;
}
3°在xml中使用
<bean class="example.SimpleMovieCatalog">
<qualifier value="main"/>
</bean>
(3)
如果通过名字进行注解注入,主要使用的不是@Autowired(即使在技术上能够通过@Qualifier执行bean的名字),替代方式是使用JSR-250标准中的@Resource注解,它是通过其独特的名称来定义来识别特性的名称(这是一个与所声明的类型无关的匹配过程)
因语义差异,集合或Map类型的bean无法通过@Autowired来注入,这是因为没有类型匹配到这样的bean。为这些bean使用@Resource注解,可以通过唯一名称引用集合或Map的bean。
@Autowired适用于fields,constructors,multi-argument methods这些允许在参数级别使用@Qualifier注解缩小范围的情况
@Resource适用于成员变量、只有一个参数的setter方法,所以在目标是构造器或一个多参数方法时,最好的方式使用qualifiers
(4)定义自己的qualifier注解并使用
定义:
@Target({ElementType.FIELD, ElementType.PARAMETER})
@Retention(RetentionPolicy.RUNTIME)
@Qualifier
public @interface Genre {
String value();
}
使用:
public class MovieRecommender {
@Autowired
@Genre("Action")
private MovieCatalog comedyCatalog;
@Atuowired
public void setComedyCatalog(@Genre("Comedy") MovieCatalog comedyCatalog) {
this.comedyCatalog = comedyCatalog;
}
}
在xml中定义
<bean class="example.SimpleMovieCatalog">
<qualifier type="Genre" value="Action"/>
</bean>
4-5 Spring Bean装配之基于Java的容器注解说明——@Bean
1.定义
(1)Bean标识一个用于配置和初始化一个由SpringIoC容器管理的新对象的方法,类似于XML配置文件的<bean/>
(2)可以在Spring的@Component注解的类中,使用@Bean注解任何方法(仅仅是可以)
(3)上一点中,通常使用的是@Configuration(即将该类当做一个配置文件来使用)
(4)如:
@Configuration
public class AppConfig {
@Bean
public MyService myService() {
return new MyServiceImpl();
}
}
等价于
<beans>
<bean id="myService" class="com.acme.services.MyServiceImpl"/>
</beans>
2.自定义Bean name
public class AppConfig {
@Bean(name="myFoo")
public Foo foo() {
return new Foo();
}
}
3.可以使用init-method和destory-method
public class Foo {
public void init() {
//初始化逻辑
}
}
public class Bar {
public void cleanup() {
//销毁逻辑
}
}
@Configuration
public class AppConfig {
@Bean(initMethod="init")
public Foo foo() {
return new Foo();
}
@Bean(destoryMethod="cleanup")
public Bar bar() {
return new Bar();
}
}
4-6 Spring Bean装配之基于Java的容器注解说明——@ImportResource和@Value(进行资源文件读取)
1.使用xml来进行资源文件的读取
<beans>
<context:annotation-config/>
//使用property-placeholder并指定location,来加载properties文件
<context:property-placeholder location="classpath:/com/acme/jdbc.properties"/>
<bean class="com.acme.AppConfig"/>
<bean class-"org.springframework.jdbc.datasource.DriverManagerDataSource">
property name="url" value="${jdbc.url}" />
<property name="username" value="${jdbc.username}" />
<property name="password" value="${jdbc.password}" />
</bean>
</beans>
2.使用注解进行资源文件的读取
@Configuration
@ImportResource("classpath:/com/acme/properties-config.xml") //导入资源文件
public class AppConfig {
@Value("${jdbc.url}")
private String url;
@Value("${jdbc.username}")
private String username;
@Value("${jdbc.password}")
private String password;
@Bean
public DataSource dataSource() { //创建bean并把成员变量赋给它
return new DriverManagerDataSource(url, username, password);
}
}
注意:在jdbc.properties中,要用jdbc.username,因为username是当前数据库的用户的用户名,而jdbc.username是配置文件中的用户名
4-7 Spring Bean装配之基于Java的容器注解说明——@Bean和@Scope
1.@Bean默认是单例的,使用@Scope可以改变,如:
@Configuration
public class MyConfiguration {
@Bean
@Scope("prototype")
public Encryptor encryptor() {
//…
}
}
或
@Bean
@Scope(value="session", proxyMode=ScopedProxyMode.TARGET_CLASS)
public UserPerferences userPreferences() {
return new UserPreferences;
}
4-8 Spring Bean装配之基于Java的容器注解说明——基于泛型的自动装配
1.使用
@Configuration
public class MyConfiguration {
@Bean
public StringStore stringStore() {
return new StringStore();
}
@Bean
public IntegerStore integerStore() {
return new IntegerStore();
}
}
(1)方式1
@Autowired
private Store<String> s1;
@Autowired
private Store<Integer> s2;
(2)方式2
@Autowired
private List<Store<Integer>> s;
2.@Autowired的拓展内容——自定义qualifier注解
(1)CustomAtuowireConfigurer是BeanFactoryPostProcessor的子类,通过它可以注册自己的qualifier注解类型(即使没有通过Spring的@Qualifier注解)
<bean id="customAutowireConfigurer"
class="org.springframework.beans.factory.annotation.CustomAutowireConfigurer">
<property name="customQualifierTypes"> //用来放类型
<set> //这是set,可以放多个类型
<value>example.CustomQualifier</value>
</set>
</property>
</bean>
(2)该AutowireCandidateResolver决定自动装配的候选者:
1°每个bean定义的autowire-candidate值
2°或任何<bean/>中的default-autowire-candidates
3°或@Qualifier注解及使用CustomAutowireConfigurer的自定义类型
4-9 Spring Bean装配之Spring对JSR支持的说明
JSR:Java规范提案(任何人都可以提交“规范提案”,然后经过委员会审核,随着技术的发展,会围绕其中某些规范做出对应的实现)
1.@Resource
(1)Spring支持使用JSR-250@Resource注解的变量或setter方法,这是一种在Java EE 5和6的通用模式,Spring管理的对象也支持这种模式
(2)@Resource有一个name属性,并且默认Spring解释该值作为被注入bean的名称
public class SimpleMovieListener {
private MovieFinder movieFinder;
@Resource(name="myMovieFinder")
public void setMovieFinder(MovieFinder movieFinder) {
this.movieFinder = movieFinder;
}
}
(3)如果没有显示地指定@Resource的name,默认的名称是从属性名或者setter方法得出
public class SimpleMovieListener {
private MovieFinder movieFinder;
@Resource
public void setMovieFinder(MovieFinder movieFinder) {
this.movieFinder = movieFinder;
}
}
(4)注解提供的名字被解析为一个bean的名称,这是由ApplicationContext中的CommonAnnotationBeanPostProcessor发现并处理的
2.@PostConstruct和@PreDestory
(1)CommonAnnotationBeanPostProcessor不仅能识别JSR-250中的声明周期注解@Resource,在Spring2.5也引入支持了初始化回调和销毁回调(回调即执行一个方法前/后先执行回调方法),前提是CommonAnnotationBeanPostProcessor是在Spring的ApplicationContext中注册的,如:
public class CachingMoiveListener {
@PostConstruct
public void populatemovieCache() {
//…
}
@PreDestory
public void clearMovieCache() {
//…
}
}
3.JSR330的标准注解
(1)从Spring3.0开始支持JSR330标准注解(依赖注入注解),其扫描方式与Spring注解一致
(2)使用JSR330需要依赖javax.inject包
(3)使用Maven引入方式
<dependency>
<groupId>javax.inject</groupId>
<artifactId>javax.inject</artifactId>
<version>1</version>
</dependency>
4.@Inject
(1)@Inject等效于@Autowired,可以使用于类、属性、方法、构造器
import javax.inject.Inject;
public class SimpleMovieListener {
private MovieFinder movieFinder;
@Inject
public void setMovieFinder(MovieFinder movieFinder) {
this.movieFinder = movieFinder;
}
}
5.@Named
(1)如果在一个IoC容器中有多个同类型的bean,如果想使用特定名称进行依赖注入,使用@Named
(2)@Named与@Component是等效的
(3)使用方式
1°
import javax.inject.Inject;
import javax.inject.Named;
public class SimpleMovieListener {
private MovieFinder movieFinder;
@Inject
public void setMovieFinder(@Named("main") MovieFinder movieFinder) {
this.movieFinder = movieFinder;
}
}
2°
@Named("movieListener")
public class SimpleMovieListener {
private MovieFinder movieFinder;
@Inject
public void setMovieFinder(MovieFinder movieFinder) {
this.movieFinder = movieFinder;
}
}
查看全部 -
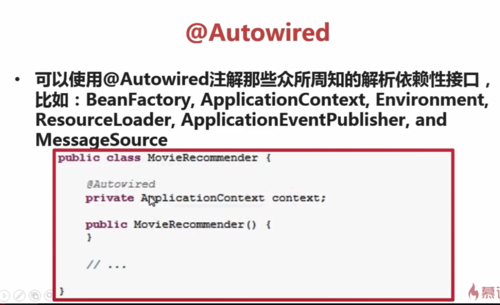
@Autowired新用法
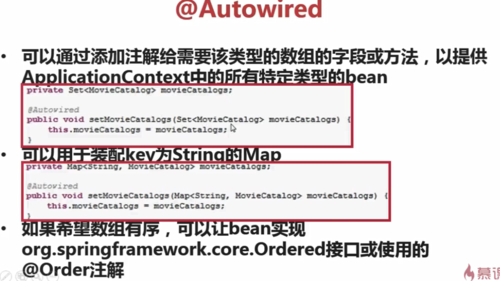
不能使用@Autowired的情况
 查看全部
查看全部 -
@Required
@Autowired
 查看全部
查看全部 -
Bean相关注解
元注解(自定义注解)
 查看全部
查看全部 -
Resources
 查看全部
查看全部 -
Bean的自动装配
 查看全部
查看全部 -
Bean的声明周期
 查看全部
查看全部 -
spring Bean配置
 查看全部
查看全部 -
Spring注入方式
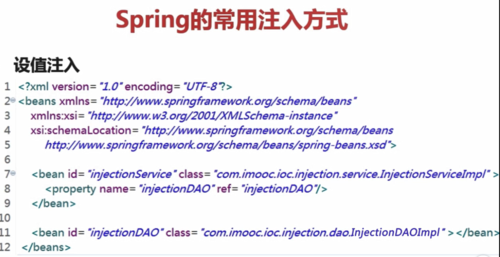
setter注入

构造器注入
 查看全部
查看全部 -
IOC及Bean容器
 查看全部
查看全部 -
什么是框架?
框架的特点

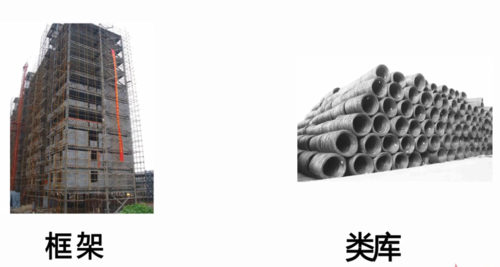
为什么使用框架?
 查看全部
查看全部 -
spring适用范围
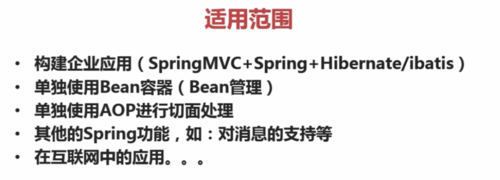 查看全部
查看全部 -
Spring内容简概
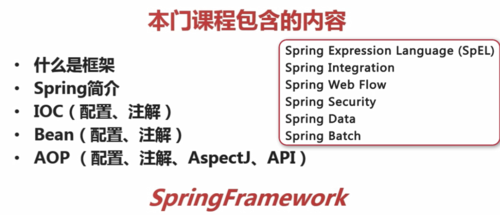
 查看全部
查看全部 -
配置切入点Pointcut(找到某个功能模块的具体方法)
execution用于匹配某个功能模块的具体方法。
以下SpringAOP和Spring支持的AspectJ都支持。
execution(public * *(..)):执行所有的public方法时,进行切入(执行相应切面的相应功能)。
execution(* set*(..)):执行所有的set方法时,进行切入。
execution(* com.xyz.service.AccountService.*(..)):执行com.xyz.service.AccountService类下的所有方法(public/protected/private方法)时,进行切入。
execution(* com.xyz.service..(..)):切入点为com.xyz.service包下的所有方法
execution(* com.xyz.service...(..)):切入点为com.xyz.service包及其子包下的所有方法
以下为SpringAOP自己支持的。
 查看全部
查看全部 -
基于Schema-based配置的AOP实现
Spring所有的切面和通知器都必须放在<aop:config>内(可以配置多个<aop:config>元素),每一个<aop:config>可以包含aspect,pointcout,advisor元素(它们必须按照这个顺序进行声明)。
<aop:config>的配置大量使用了Spring的自动代理机制。
该配置的含义:一个类作为切面来声明,切面Id是myAspect,也就是说程序执行某个功能模块时,通过pointcut和Joinpoint执行该切面的功能。
案例:两个类,一个类作为切面类,另一个作为业务类。(注意:<beans>中添加约束,xmlns:aop="http://www.springframework.org/schema/aop"
xsi:schemaLocation="http://www.springframework.org/schema/aop
http://www.springframework.org/schema/aop/spring-aop-4.0.xsd">
)
代码:
<?xml version="1.0" encoding="UTF-8"?>
<beans xmlns="http://www.springframework.org/schema/beans"
xmlns:xsi="http://www.w3.org/2001/XMLSchema-instance"
xmlns:context="http://www.springframework.org/schema/context"
xmlns:aop="http://www.springframework.org/schema/aop"
xsi:schemaLocation="http://www.springframework.org/schema/beans
http://www.springframework.org/schema/beans/spring-beans.xsd
http://www.springframework.org/schema/context
http://www.springframework.org/schema/context/spring-context.xsd
http://www.springframework.org/schema/aop
http://www.springframework.org/schema/aop/spring-aop-4.0.xsd">
<bean id="aspectImooc" class="aspect.AspectImooc"></bean>
<bean id="ServiceImooc" class="aspect.ServiceImooc"></bean>
<aop:config>
<aop:aspect id="aspectImoocAop" ref="aspectImooc"></aop:aspect>
</aop:config>
查看全部
举报


