这俩天, kotlin 比较火热,刚好空下来,打算也了解一下 这里记录一下学习的过程-
其实也很早就有接触到kotlin ,是在张涛实验室 附上传送门:https://kymjs.com/
只不过那个时候对这个并不是很感兴趣,个人习惯吧
1.开发环境配置
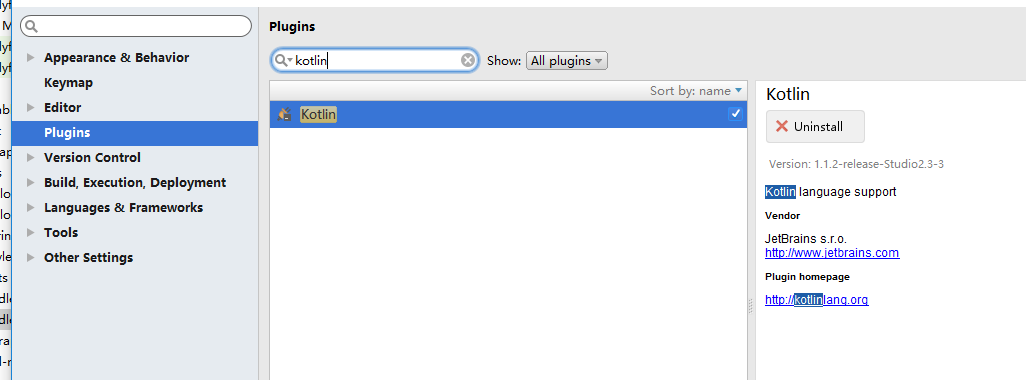
打开android studio, -->Setting --> Pligins --> 搜索Kotlin -->install 一下 ,安装完之后,restart Android studio.
2.项目gradle文件
dependencies {
    classpath 'com.android.tools.build:gradle:2.3.2'

    // NOTE: Do not place your application dependencies here; they belong
    // in the individual module build.gradle files
    classpath 'org.jetbrains.kotlin:kotlin-gradle-plugin:1.1.1'
}
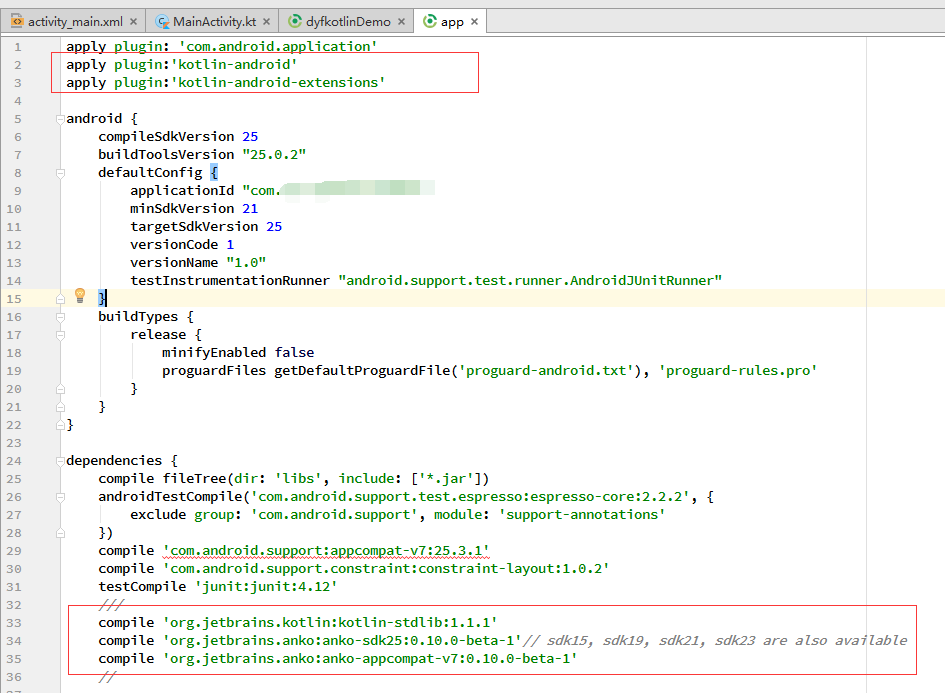
app Gradle文件:
apply plugin: 'com.android.application'
apply plugin:'kotlin-android'
apply plugin:'kotlin-android-extensions'
//kotlin
compile 'org.jetbrains.kotlin:kotlin-stdlib:1.1.1'
compile 'org.jetbrains.anko:anko-sdk25:0.10.0-beta-1'// sdk15, sdk19, sdk21, sdk23 are also available
compile 'org.jetbrains.anko:anko-appcompat-v7:0.10.0-beta-1'
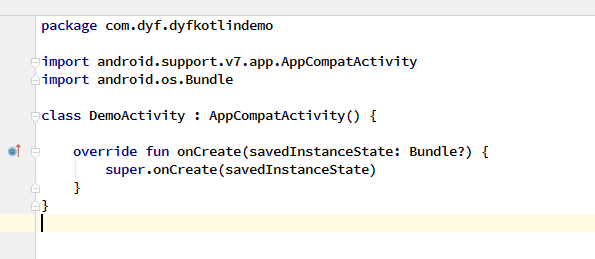
3. 然后 sync Now 之后, 开始新建 KotlinActivity,
然后就是写代码了, 发现 和之前稍稍有些不同,但是可以看得很清晰,
之前写控件 都需要申明,然后findViewById 强转成控件,或者使用注解,一般 butterknife 用的比较多,
public TextView song_name;
song_name= (TextView) findViewById(R.id.main_song_name);
@BindView(R.id.main_song_name)
TextView song_name;
song_name.setText("hello, world!");而kotlin 可以直接用,
song_name.text="hello, world!";
song_name就是我们布局文件声明的id,.text就想当与setText()给,在Kotlin语言中,我们看不到了像Java中的set/get方法了。
只需要导入:import org.jetbrains.anko.*;一般 studio 会给出提示,导入就行了.
当然我们也可以给他设置其他数据,比方说字体大小等
使用 verticalLayout 创建动态布局,(听说这样更加安全,节约cpu,省电)
verticalLayout {
    val textView=textView("我是一个TextView"){
        textSize = sp(17).toFloat()
        textColor=context.resources.getColor(R.color.red)
    }.lparams{
        margin=dip(10)
        height= wrapContent
        width= matchParent
    }
   ...
}
从上面的代码中,显而易见的,可以看出, 字体 17sp red 字体颜色, margin 歪边距 10dp, height && width 等基础属性,这些属性和之前一样,他拥有xml创建布局的层级关系,即使不懂语法,但基本也看懂,更容易阅读.
val name = editText("EditText")一个editText控件, 输入 EditText 填充,
button("Button") {
    onClick { view ->

    }
}
button 按钮的点击事件 支持lambda表达式。关于lambda表达式, 也有点兴趣,打算有时间深入学习下,
toast("Hello, world!")显示一个Toast,只需要toast("内容")就可以了
//
alert ("我是Dialog"){
    yesButton {
        toast("yes")
    }
    noButton {  toast("no")}
}.show()
一个Toast可以这样,有么有发现这样写很简便
doAsync {
    //后台执行代码
    uiThread {
        //UI线程
        toast("线程${Thread.currentThread().name}")
    }
}
不用怀疑,就是一个AsyncTask, 你会发现它比Java的实现简洁多了.
附上手写代码
import android.os.Bundle
import android.support.v7.app.AppCompatActivity
import android.view.View
import org.jetbrains.anko.*

class MainActivity : AppCompatActivity() {

    inner class UI : AnkoComponent<MainActivity> {
        override fun createView(ui: AnkoContext<MainActivity>): View {
            return with(ui){
                verticalLayout {
                    val textView=textView("我是一个TextView"){
                        textSize = sp(17).toFloat()
                        textColor = context.resources.getColor(R.color.red)
                    }.lparams{
                        margin=dip(10)
                        height= wrapContent
                        width= matchParent
                    }
                    val name = editText("EditText")
                    button("Button") {
                        onClick { view ->
                            toast("Hello, world!")
                            //
                            alert ("我是Dialog"){
                                yesButton {
                                    toast("yes")
                                    doAsync {
                                        //后台执行代码
                                        	uiThread {
                                            //UI线程
                                            	    toast("线程${Thread.currentThread().name}")
                                        }
                                    }
                                }
                                noButton {  toast("no")}
                            }.show()
                        }
                    }
                }
            }
        }
    }


    override fun onCreate(savedInstanceState: Bundle?) {
        super.onCreate(savedInstanceState)
        UI().setContentView(this@MainActivity)
    }
}
这是我刚开始学习kotlin 做下笔记 共同参考交流进步,若有不对,请指正
共同学习,写下你的评论
评论加载中...
作者其他优质文章


