通过本文所述方法和项目中的脚本,我们可以快速的搭建好自己的私有链进行区块链开发测试,本文基于以太坊技术进行搭建,分两个部分,一个是Ubuntu下搭建方法,另一个是Windwos下搭建方法,关于以太坊相关的基础知识,可以看我原先发表的一些文章,地址如下: http://blog.csdn.net/sportshark
一、 Ubuntu下安装Geth客户端
之所以采用Ubuntu,是因为以太坊的官方对Ubuntu支持的很好,是在各个linux系统中安装最简单。
Geth官方安装指南:
https://github.com/ethereum/go-ethereum/wiki/Building-Ethereum
进入ubuntu命令行,执行如下命令
sudo apt-get update
sudo apt-get installsoftware-properties-common
sudo add-apt-repository -yppa:ethereum/ethereum
sudo add-apt-repository -yppa:ethereum/ethereum-dev
sudo apt-get update
sudo apt-get install ethereum
系统联网执行后,即完成了安装以太坊客户端,其中包括geth,bootnode, evm, disasm, rlpdump,ethtest
此时如果输入Geth命令,会出现启动以太坊启动的画面
二、 安装Windows下Geth客户端
Windows必须64位系统,从官方网站下载编译好的win64客户端,解压缩即可运行,下载地址如下:
https://github.com/ethereum/go-ethereum/releases/
下载后,只有一个Geth.exe的文件。
安装图像化客户端Mist,依然是从官方地址下载编译好的客户端即可,下载地址:
https://github.com/ethereum/mist/releases/
下载解压缩后,Ethereum-Wallet即为以太坊图形化界面。
三、 准备创世块文件
配置自己的创世块是为了区分公有链,同一个网络中,创世块必须是一样的,否则无法联通,此方法在windows和Ubuntu下通用。
新建文件piccgenesis.json,输入如下内容并保存
{
"nonce":"0x0000000000000042",
"mixhash":"0x0000000000000000000000000000000000000000000000000000000000000000",
"difficulty": "0x4000",
"alloc": {},
"coinbase":"0x0000000000000000000000000000000000000000",
"timestamp": "0x00",
"parentHash":"0x0000000000000000000000000000000000000000000000000000000000000000",
"extraData": "PICC GenesisBlock",
"gasLimit":"0xffffffff"
}
解释一下各个参数的作用:
mixhash | 与nonce配合用于挖矿,由上一个区块的一部分生成的hash。注意他和nonce的设置需要满足以太坊的Yellow paper, 4.3.4. Block Header Validity, (44)章节所描述的条件。. |
nonce | nonce就是一个64位随机数,用于挖矿,注意他和mixhash的设置需要满足以太坊的Yellow paper, 4.3.4. Block Header Validity, (44)章节所描述的条件。 |
difficulty | 设置当前区块的难度,如果难度过大,cpu挖矿就很难,这里设置较小难度 |
alloc | 用来预置账号以及账号的以太币数量,因为私有链挖矿比较容易,所以我们不需要预置有币的账号,需要的时候自己创建即可以。 |
coinbase | 矿工的账号,随便填 |
timestamp | 设置创世块的时间戳 |
parentHash | 上一个区块的hash值,因为是创世块,所以这个值是0 |
extraData | 附加信息,随便填,可以填你的个性信息 |
gasLimit | 该值设置对GAS的消耗总量限制,用来限制区块能包含的交易信息总和,因为我们是私有链,所以填最大。 |
四、 启动私有链节点
启动Geth即可以启动以太坊的区块链,为了构建私有链 ,需要在Geth启动时加入一些参数,Geth参数含义如下:
identity | 区块链的标示,随便填写,用于标示目前网络的名字 |
init | 指定创世块文件的位置,并创建初始块 |
datadir | 设置当前区块链网络数据存放的位置 |
port | 网络监听端口 |
rpc | 启动rpc通信,可以进行智能合约的部署和调试 |
rpcapi | 设置允许连接的rpc的客户端,一般为db,eth,net,web3 |
networkid | 设置当前区块链的网络ID,用于区分不同的网络,是一个数字 |
console | 启动命令行模式,可以在Geth中执行命令 |
1、 在Ubuntu启动区块链节点
在Ubuntu下,首先切换到打算运行的目录,目录下应该有配置好的piccgenesis.json文件,执行如下命令
basepath=$(cd `dirname $0`; pwd)
获取当前的目录
geth --datadir "$basepath/chain" init piccgenesis.json
创建数据存放地址并初始化创世块
geth --identity"PICCetherum" --rpc --rpccorsdomain "*" --datadir "$basepath/chain" --port "30303" --rpcapi "db,eth,net,web3"--networkid 95518 console
启动后界面如下,光标停留在最后的命令行上,可以执行以太坊命令。
I0707 00:45:43.680087 ethdb/database.go:82]Alloted 128MB cache and 1024 file handles to /home/lihe/桌面/chain/chaindata
I0707 00:45:43.726008ethdb/database.go:169] closed db:/home/lihe/桌面/chain/chaindata
I0707 00:45:43.728913 ethdb/database.go:82]Alloted 128MB cache and 1024 file handles to /home/lihe/桌面/chain/chaindata
I0707 00:45:43.908795 ethdb/database.go:82]Alloted 16MB cache and 16 file handles to /home/lihe/桌面/chain/dapp
I0707 00:45:43.969506 core/genesis.go:92]Genesis block already in chain. Writing canonical number
I0707 00:45:43.980337 eth/backend.go:274]Successfully wrote custom genesis block:6e92f8b23bcdfdf34dc813cfaf1d84b71beac80530506b5d63a2df10fe23a660
I0707 00:45:43.980618 eth/backend.go:184]Protocol Versions: [63 62], Network Id: 95518
I0707 00:45:43.981567core/blockchain.go:204] Last header: #81 [6193c4b0…] TD=10836704
I0707 00:45:43.981645core/blockchain.go:205] Last block: #81 [6193c4b0…] TD=10836704
I0707 00:45:43.981677core/blockchain.go:206] Fast block: #81 [6193c4b0…] TD=10836704
I0707 00:45:43.985253 p2p/server.go:313]Starting Server
I0707 00:45:45.834488p2p/discover/udp.go:217] Listening,enode://134881790e54c803955715e3661c27f91caaf499be813e29c9f986e2eac62d47e02b13a8e51776c1caea554655614ed26ce0185d84e626da7ac48a83a60113ff@[::]:30303
I0707 00:45:45.835853 node/node.go:366]HTTP endpoint opened: http://localhost:8545
I0707 00:45:45.848008 p2p/server.go:556]Listening on [::]:30303
I0707 00:45:45.849731 node/node.go:296] IPCendpoint opened: /home/lihe/桌面/chain/geth.ipc
Welcome to the Geth JavaScript console!
instance:Geth/v1.5.0-unstable/linux/go1.5.1/PICCetherum
coinbase:0x93509a2f4b2b974b07ef0b52e07c3992601f5de1
at block: 81 (Tue, 05 Jul 2016 21:02:25CST)
datadir: /home/lihe/桌面/chain
modules: admin:1.0 debug:1.0 eth:1.0 miner:1.0net:1.0 personal:1.0 rpc:1.0 txpool:1.0 web3:1.0
>
可以看到Listening on [::]:30303和Welcome to the Geth JavaScript console!的提示,说明已经启动成功
注意:如果想将Ubuntu作为永久区块链节点使用,当使用nohup命令时,Geth启动参数console必须去掉,否则Geth会自动停止。
2、 在windows启动区块链节点
进入Windows下Geth的目录 ,放置配置好的piccgenesis.json文件,执行如下命令:
geth --datadir "%cd%\chain" init piccgenesis.json
创建数据存放地址并初始化创世块
geth--identity "PICCetherum" --rpc--rpccorsdomain "*" --datadir "%cd%\chain" --port"30303" --rpcapi"db,eth,net,web3" --networkid 95518 console
当看到Listening on [::]:30303和Welcome to the Geth JavaScript console!的提示,说明已经启动成功
五、 使用节点创建账号
启动节点成功后,会进入Geth的命令行模式,输入如下命令
personal.newAccount()
系统会提示你输入账号密码,并确认,最后会显示一个新生成的账号。
六、 启动Windows下私有链图形节点
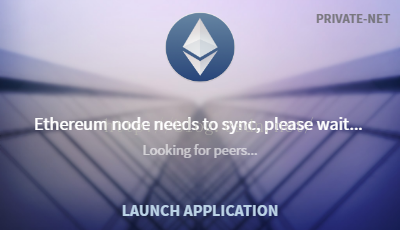
首先按上面的步骤启动Geth并创建了账号,然后解压缩Ethereum-Wallet,运行Ethereum-Wallet.exe,即启动成功,如果区块链正常的话,会在右上角显示“PRIVATE-NET”,点击“LAUNCH APPLICATION”进入图形界面即可。
七、 连接其他节点
首先要知道自己的节点信息,在Geth命令行界面下输入命令,注意大小写
admin.nodeInfo
系统会显示
enode:"enode://1e3c1727cd3bee9f25edeb5dbb3b880e03e41f8eec99566557f3ee0422734a8fcad17c161aa93d61bdbfb28ed152c143c7eb501db58bc63502a104a84b62d742@0.0.0.0:30303“
其中
enode://1e3c1727cd3bee9f25edeb5dbb3b880e03e41f8eec99566557f3ee0422734a8fcad17c161aa93d61bdbfb28ed152c143c7eb501db58bc63502a104a84b62d742@0.0.0.0:30303
就是自己节点的信息,注意要把“0.0.0.0“换成你自己的IP。将这个信息发送给其他节点,在其他节点的命令行中输入:
admin.addPeer(‘enode://1e3c1727cd3bee9f25edeb5dbb3b880e03e41f8eec99566557f3ee0422734a8fcad17c161aa93d61bdbfb28ed152c143c7eb501db58bc63502a104a84b62d742@192.168.1.101:30303’)
如果添加成功,输入admin.peers会显示出新添加的节点。
八、 使用节点进行挖矿
在Geth命令行界面下,输入miner.start()即启动挖矿,挖矿后,会不停刷屏,输入miner.stop()即停止,不用管刷屏导致的命令不全,命令会正常执行。
到这一步,已经组建一个私有链的网络,可以像其他区块链一样不停的扩充这个网络,下一篇文章,我会介绍如何在私有链上编写、调试和部署智能合约。
参考文章:
1. http://tech.lab.carl.pro/kb/ethereum/testnet_setup
2. http://www.ethdocs.org/en/latest/network/test-networks.html#setting-up-a-local-private-testnet
3. https://github.com/ethereum/go-ethereum/wiki/Connecting-to-the-network
4. https://github.com/ethereum/go-ethereum/wiki/JavaScript-Console
5. https://github.com/ethereum/go-ethereum/wiki/Mining
6. https://github.com/ethereum/go-ethereum/wiki/Managing-your-accounts
7. https://github.com/janx/ethereum-bootstrap
原文出处:https://blog.csdn.net/sportshark/article/details/51855007
共同学习,写下你的评论
评论加载中...
作者其他优质文章


