1. 为什么要用MQ
在使用SpringCloud或Dubbo进行SOA架构后,不同的应用层模块(web)与业务层模块(service)要建立调用关系,也就是依赖/耦合
当模块变多时,模块间的耦合度也会逐步上升,这就需要一个解耦工具:消息中间件
另外,如果某个业务流程分为很多步,某一步特别耗时间且不稳定,整个业务的稳定性就会受很大影响,这时也需要用消息中间件来分离这些不稳定的业务过程
2. 到底什么是MQ
消息中间件利用高效可靠的消息传递机制进行平台无关的数据交流,并基于数据通信来进行分布式系统的集成。通过提供消息传递和消息排队模型,它可以在分布式环境下扩展进程间的通信。
在这里面,关键的部分是“消息传递”和“消息排队”,可以保证事件的顺序性,也可以在高并发下使用。
3. 什么时候可以用MQ
执行过程长,且不需要返回结果的功能,可以利用MQ传递(MQ的异步通信特征)
4. MQ与JMS
JMS(Java Message Service),是一套接口规范,在jdk中已定义好接口(类似于JDBC,只有JDBC无法操作数据库,需要具体的驱动来实现功能)。
4.1 JMS预定义的五种消息正文格式
TextMessage(String)——普通文本(用得最多)
MapMessage(Map)——键值对集合(用的次多)
ObjectMessage(Serializable Object)——可序列化的对象
BytesMessage(byte[])——字节数组
StreamMessage(Stream)——流数据
4.2 JMS的消息传递
JMS的传递模式非常像观察者模式的思路:
定义对象间的一种一对多的依赖关系,让多个观察者同时监听某一个主题现象,当一个对象的状态发生改变时,会通知所有观察者对象,所有依赖于它的对象都得到通知并被自动更新。
观察者模式——https://my.oschina.net/LinkedBear/blog/1791975
消息传递的方式有两种:
4.2.1 Queue点对点(生产者与消费者的一对一关系)
4.3.2 Topic发布-订阅(生产者与消费者的一对多关系)
5. MQ的工作原理
6. 不同MQ之间的对比
引用文章图片:https://blog.csdn.net/jasonhui512/article/details/53231566
7. 怎么用MQ
选用阿里巴巴的RocketMQ(现已被Apache接手),搭建Demo工程
参考文档:http://rocketmq.apache.org/docs/simple-example/
7.1 安装RocketMQ
参考文章:https://www.jianshu.com/p/4a275e779afa
从Apache的官网上下载运行包 |
配置环境变量 |
依次运行mqnamesrv.cmd脚本和mqbroker.cmd脚本 |
从https://github.com/apache/rocketmq-externals.git下载监控插件,并解压 |
进入“rocketmq-console\src\main\resources”文件夹,打开“application.properties”进行配置 |
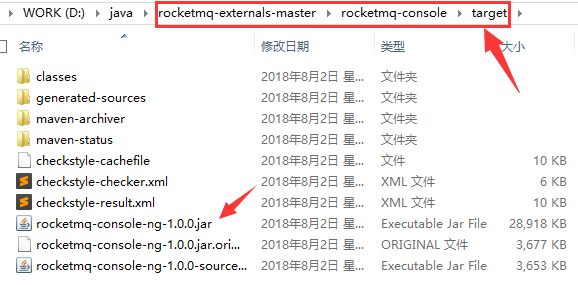
进入“rocketmq-console”文件夹,执行“mvn clean package -Dmaven.test.skip=true”,编译生成 |
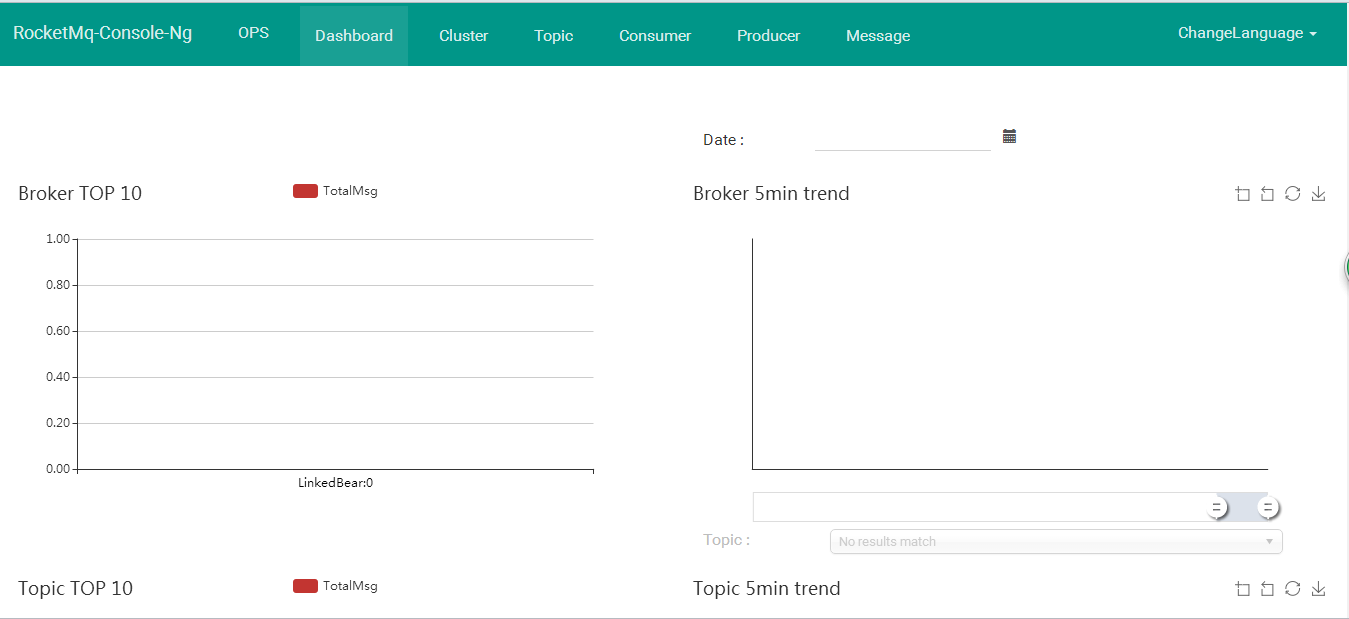
进入“target”文件夹,执行“java -jar rocketmq-console-ng-1.0.0.jar”,启动“rocketmq-console-ng-1.0.0.jar”(此jar为SpringBoot项目) |
7.2 搭建Maven工程框架
<project xmlns="http://maven.apache.org/POM/4.0.0" xmlns:xsi="http://www.w3.org/2001/XMLSchema-instance"     xsi:schemaLocation="http://maven.apache.org/POM/4.0.0 http://maven.apache.org/xsd/maven-4.0.0.xsd">     <modelVersion>4.0.0</modelVersion>     <groupId>com.linkedbear</groupId>     <artifactId>MQ-Demo</artifactId>     <version>0.0.1-SNAPSHOT</version>

     <properties>        <rocketmq.version>4.3.0</rocketmq.version>    </properties>     <parent>         <groupId>org.springframework.boot</groupId>         <artifactId>spring-boot-starter-parent</artifactId>         <version>2.0.0.RELEASE</version>     </parent>     <dependencies>         <dependency>              <groupId>org.springframework.boot</groupId>              <artifactId>spring-boot-starter-web</artifactId>         </dependency>         <!-- RocketMQ -->         <dependency>             <groupId>org.apache.rocketmq</groupId>             <artifactId>rocketmq-client</artifactId>             <version>${rocketmq.version}</version>         </dependency>

         <!-- 热部署 -->         <dependency>              <groupId>org.springframework.boot</groupId>              <artifactId>spring-boot-devtools</artifactId>         </dependency>     </dependencies>     <build>         <plugins>              <plugin>                   <artifactId>maven-compiler-plugin</artifactId>                   <configuration>                       <source>1.8</source>                       <target>1.8</target>                   </configuration>              </plugin>         </plugins>     </build></project>
7.3 创建工程目录结构
7.4 生产者Controller
/**
 * 生产者Controller
 * @Title ProducerController
 * @author LinkedBear
 * @Time 2018年8月2日 下午3:22:02
 */@Controllerpublic class ProducerController {
    //此分组名必须保证全局唯一(考虑到负载均衡等后续问题),故封装为静态常量
    public static final String PRODUCE_GROUP_NAME = "TestGroup";    //MQ的运行地址
    public static final String MQ_IP = "127.0.0.1:9876";
    @RequestMapping("/produceMessage")    @ResponseBody
    public Map<String, Object> produceMessage() throws Exception {        //1. 创建生产者连接(类似于JDBC中的Connection),要传入MQ的分组名
        DefaultMQProducer producer = new DefaultMQProducer(PRODUCE_GROUP_NAME);        //2. 设置MQ的运行地址
        producer.setNamesrvAddr(MQ_IP);        //3. 开启连接
        producer.start();
        //4. 构造消息(重载方法较多,此处选择topic, tag, message的三参数方法)
        Message message = new Message("test_topic", "test_tag", ("test_message。。。" + Math.random()).getBytes());        //5. 发送消息,该方法会返回一个发送结果的对象
        SendResult result = producer.send(message);
        System.out.println(result.getSendStatus());        //6. 关闭连接
        producer.shutdown();
        //此处将发送结果显示在页面上,方便查看
        Map<String, Object> map = new HashMap<>();
        map.put("消息", result.getSendStatus());        return map;
    }
}
7.5 消费者Controller
/**
 * 消费者Controller
 * @Title ConsumerController
 * @author LinkedBear
 * @Time 2018年8月2日 下午3:22:11
 */@Controllerpublic class ConsumerController {
    @RequestMapping("/getMessage")    @ResponseBody
    public void getMessage() throws Exception {        //1. 创建消费者连接,要传入MQ的分组名,该分组名在ProducerController中
        //此处创建的是pushConsumer,它使用监听器,给人的感觉是消息被推送的
        //pullConsumer,取消息的过程需要自己写
        DefaultMQPushConsumer consumer = new DefaultMQPushConsumer(ProducerController.PRODUCE_GROUP_NAME);        //2. 设置MQ的运行地址
        consumer.setNamesrvAddr(ProducerController.MQ_IP);        //3. 设置消息的提取顺序
        consumer.setConsumeFromWhere(ConsumeFromWhere.CONSUME_FROM_FIRST_OFFSET);        //4. 设置消费者接收消息的Topic和Tag,此处对Tag不作限制
        consumer.subscribe("test_topic", "*");
        //5. 使用监听器接收消息
        consumer.registerMessageListener(new MessageListenerConcurrently() {            @Override
            public ConsumeConcurrentlyStatus consumeMessage(List<MessageExt> msgs,
                    ConsumeConcurrentlyContext context) {                try {                    for (MessageExt messageExt : msgs) {
                        String message = new String(messageExt.getBody(), "utf-8");
                        System.out.println("收到消息【主题:" + messageExt.getTopic() + ", 正文:" + message + "】");
                    }
                    return ConsumeConcurrentlyStatus.CONSUME_SUCCESS;
                } catch (Exception e) {                    //转换出现问题,稍后重新发送
                    return ConsumeConcurrentlyStatus.RECONSUME_LATER;
                }
            }
        });
        //6. 启动消费者
        consumer.start();
    }
}
7.6 测试运行
执行http://localhost:8080/produceMessage:
|
执行http://localhost:8080/getMessage: |
共同学习,写下你的评论
暂无评论
作者其他优质文章


