spring AOP切面编程
面向切面编程就是将程序中经常用到的功能抽取出来形成独立于程序业务逻辑的一个切面,当你的程序要用到的时候不要修改原来的业务代码就能将切面的功能嵌入到你的程序里面。而spring AOP 正是来帮我们实现这样的功能的。通过spring AOP能降低程序耦合性,比如在程序中经常要记录操作日志,安全认证等功能。传统上来说我们会写一个类用来专门写日志,一个类需要写日志的时候只需要调用那个写日志的类执行相应的方法就行了,这样一个类就对另一个类产生了依赖。通过spring AOP我们不用在我们的业务代码里关心业务以外的代码,只需要实现我们的业务代码就行,其他的都给切面。这个有点像python中的装饰器,对python熟悉的就容易理解了,而在python中也很容实现,这是函数式编程的一大特点吧,但是对于纯面向对象的java来说实现就得借助动态代理来实现了,本博客只是简单的介绍什么是spring AOP以及其用法,对于其实现原理感兴趣的可以自己研究。
从一个小需求说起:一天老板对你说:你把这个程序中所有函数的执行时间给我打印出来,???没接触过spring AOP的一个一个方法的改啊改啊。。。。。生无可恋有没有,所有的方法。。。。怎么办??不干了,辞职!!哈哈,开个玩笑。这么简单的事,用spring AOP立马就解决。
一个小的demo
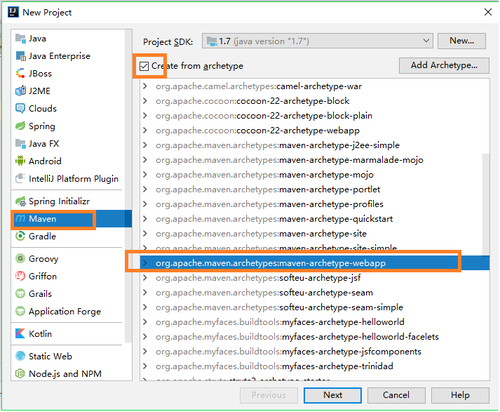
intellij idea建一个maven项目
file -->new Project --->Maven
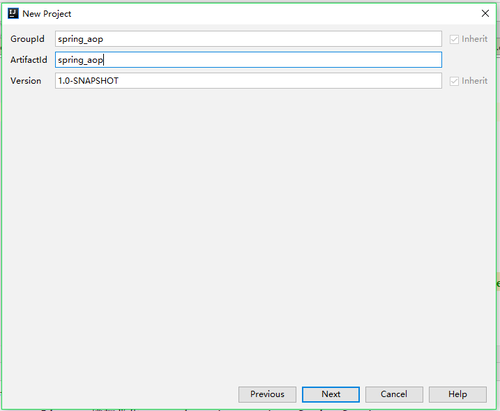
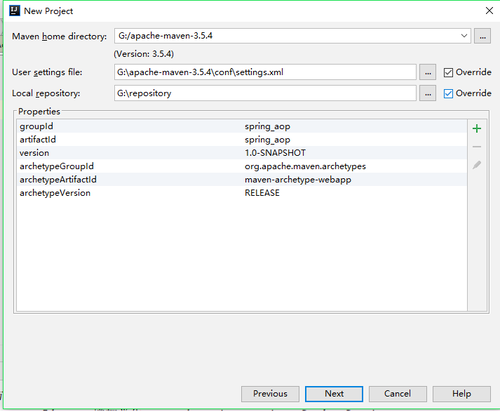
选择自己的仓库位置
设置项目位置,点下一步项目就创建好了。
配置程序的依赖包,pom.xml文件如下
<?xml version="1.0" encoding="UTF-8"?>

<project xmlns="http://maven.apache.org/POM/4.0.0" xmlns:xsi="http://www.w3.org/2001/XMLSchema-instance"
  xsi:schemaLocation="http://maven.apache.org/POM/4.0.0 http://maven.apache.org/xsd/maven-4.0.0.xsd">
  <modelVersion>4.0.0</modelVersion>

  <groupId>spring_aop</groupId>
  <artifactId>spring_aop</artifactId>
  <version>1.0-SNAPSHOT</version>
  <packaging>war</packaging>

  <name>spring_aop Maven Webapp</name>
  <!-- FIXME change it to the project's website -->
  <url>http://www.example.com</url>

  <properties>
    <project.build.sourceEncoding>UTF-8</project.build.sourceEncoding>
    <maven.compiler.source>1.7</maven.compiler.source>
    <maven.compiler.target>1.7</maven.compiler.target>
  </properties>

  <dependencies>
    <dependency>
      <groupId>junit</groupId>
      <artifactId>junit</artifactId>
      <version>4.11</version>
      <scope>test</scope>
    </dependency>

    <!--spring相关包-->
    <dependency>
      <groupId>org.springframework</groupId>
      <artifactId>spring-web</artifactId>
      <version>4.3.1.RELEASE</version>
    </dependency>
    <dependency>
      <groupId>org.springframework</groupId>
      <artifactId>spring-webmvc</artifactId>
      <version>4.3.1.RELEASE</version>
    </dependency>
    <!-- AspectJ -->
    <dependency>
      <groupId>org.aspectj</groupId>
      <artifactId>aspectjrt</artifactId>
      <version>1.6.10</version>
    </dependency>
    <dependency>
      <groupId>org.aspectj</groupId>
      <artifactId>aspectjweaver</artifactId>
      <version>1.7.2</version>
    </dependency>


  </dependencies>

  <build>
    <finalName>spring_aop</finalName>
    <pluginManagement><!-- lock down plugins versions to avoid using Maven defaults (may be moved to parent pom) -->
      <plugins>
        <plugin>
          <artifactId>maven-clean-plugin</artifactId>
          <version>3.0.0</version>
        </plugin>
        <!-- see http://maven.apache.org/ref/current/maven-core/default-bindings.html#Plugin_bindings_for_war_packaging -->
        <plugin>
          <artifactId>maven-resources-plugin</artifactId>
          <version>3.0.2</version>
        </plugin>
        <plugin>
          <artifactId>maven-compiler-plugin</artifactId>
          <version>3.7.0</version>
        </plugin>
        <plugin>
          <artifactId>maven-surefire-plugin</artifactId>
          <version>2.20.1</version>
        </plugin>
        <plugin>
          <artifactId>maven-war-plugin</artifactId>
          <version>3.2.0</version>
        </plugin>
        <plugin>
          <artifactId>maven-install-plugin</artifactId>
          <version>2.5.2</version>
        </plugin>
        <plugin>
          <artifactId>maven-deploy-plugin</artifactId>
          <version>2.8.2</version>
        </plugin>
      </plugins>
    </pluginManagement>
  </build>
</project>
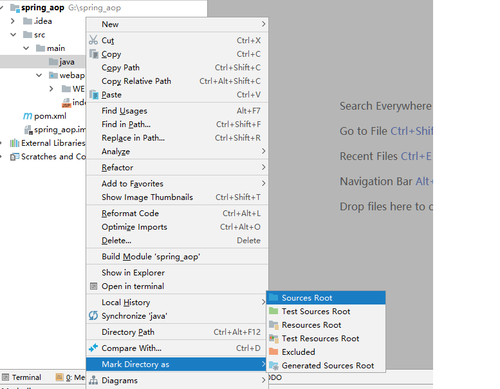
main 下新建一个resource文件,并标志为Resource Root,并创建一个bean.xml
<?xml version="1.0" encoding="UTF-8"?>
<beans xmlns="http://www.springframework.org/schema/beans"
       xmlns:xsi="http://www.w3.org/2001/XMLSchema-instance" xmlns:aop="http://www.springframework.org/schema/aop"
       xsi:schemaLocation="http://www.springframework.org/schema/beans http://www.springframework.org/schema/beans/spring-beans.xsd http://www.springframework.org/schema/aop http://www.springframework.org/schema/aop/spring-aop.xsd">

    <!--目标类-->
 <bean id="stdServer" class="com.cqh.spring.demo.services.StudentServer"></bean>

</beans>
main下新建java文件夹并将java文件夹标志为Source
新建pacakge和类
StudentServer类
package com.cqh.spring.demo.services;public class StudentServer {    public void addStudent(){        try {            //业务逻辑,
            System.out.println("执行新增学生业务");
            Thread.sleep(10000);
        } catch (InterruptedException e) {
            e.printStackTrace();
        }
    }    public void updateStudent(){        try {            //业务逻辑,
            System.out.println("执行修改学生业务");
            Thread.sleep(50000);
        } catch (InterruptedException e) {
            e.printStackTrace();
        }
    }


}
main类
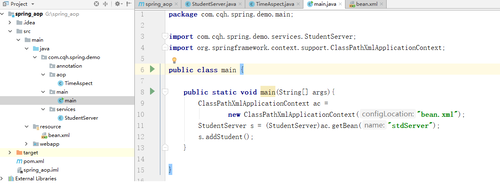
package com.cqh.spring.demo.main;import com.cqh.spring.demo.services.StudentServer;import org.springframework.context.support.ClassPathXmlApplicationContext;public class main {    public static void main(String[] args){
        ClassPathXmlApplicationContext ac =                new ClassPathXmlApplicationContext("bean.xml");
        StudentServer s = (StudentServer)ac.getBean("stdServer");
        s.addStudent();
    }

}
现在执行,会看到addStudent运行了,只是打印了执行新增学生业务,并没有输出方法的执行时间
执行新增学生业务
接下来神奇事就要发生了,在bean.xml中添加如下配置,同时TiemAspect的代码如下
<?xml version="1.0" encoding="UTF-8"?>
<beans xmlns="http://www.springframework.org/schema/beans"
       xmlns:xsi="http://www.w3.org/2001/XMLSchema-instance" xmlns:aop="http://www.springframework.org/schema/aop"
       xsi:schemaLocation="http://www.springframework.org/schema/beans http://www.springframework.org/schema/beans/spring-beans.xsd http://www.springframework.org/schema/aop http://www.springframework.org/schema/aop/spring-aop.xsd">

    <!--目标类-->
 <bean id="stdServer" class="com.cqh.spring.demo.services.StudentServer"></bean>
    <!--切面类-->
 <bean id="timeAspect" class="com.cqh.spring.demo.aop.TimeAspect"></bean>

    <!--切面配置-->
    <aop:config>
        <aop:pointcut id="std" expression="execution(* com.cqh.spring.demo.services.*.*(..))"/>

        <aop:aspect ref="timeAspect">
            <aop:around method="recorderTime" pointcut-ref="std"/>
        </aop:aspect>

    </aop:config>
</beans>
package com.cqh.spring.demo.aop;import org.aspectj.lang.ProceedingJoinPoint;import java.util.Date;/**
 * 切面类,独立于业务逻辑外的功能 */public class TimeAspect {    /**
     * 记录方法的执行时间
     * @param point     */
    public void recorderTime(ProceedingJoinPoint point){
        Long startTime = new Date().getTime();        try {
            point.proceed();
        } catch (Throwable throwable) {
            throwable.printStackTrace();
        }
        Long endTime = new Date().getTime();
        System.out.print("执行时间:"+(endTime-startTime)+"ms");

    }

}
再次运行main,等了大约10s,会发现时间已经出来了吧,在没有修改addStudent方法业务代码的基础上,把addStudent方法的执行时间输出来了吧,这样任务就完成了。
总结:
spring AOP面向切面:在不修改原有业务功能的基础给原来的方法扩展功能,其方式之一:使用配置,方式二:使用@Aspect相关注解。这里使用的是配置的方式。
要配置的东西如下:
1. 目标方法,也就是你要给他扩展功能的方法 ,也就常说的切入点表达式
这里对应于expression="execution(* com.cqh.spring.demo.services.*.*(..)) 的内容
切入点的完整的格式 execution(modifiers-pattern? ret-type-pattern declaring-type-pattern? name-pattern(param-pattern)throws-pattern?)
modifiers-pattern 修饰符 可选 public private protected
ret-type-pattern 返回类型 必选 * 代表任意类型
declaring-type-pattern 方法的声明类型
name-patterm 方法名称类型
set* 以set开头的所有的方法名称
update* 以update开头的所有的方法名称
param-pattern 参数匹配
(..) 任意多个参数,每个参数任意多个类型
(*,String) 两个参数 第一个是任意类型,第二个是String
(String,*,Integer) 三个参数,第一个是String类型,第二个是任意类型,第三个是Integer类型
throws-pattern 异常的匹配模式
例子:
execution(* com.cqh.spring.demo.services.*(..));cn.itcast.spring.aop.xml.AService下的所有的方法
execution(public * com.cqh.spring.demo.services.*.*(..)) 返回值为任意类型,修饰符为public,在com.cqh.spring.demo.services包及子包下的所有的类的所有的方法
exectuion(* com.cqh.spring..*.update*(*,String))返回值是任意类型,在com.cqh.spring包及子包下所有的以update开头的参数为两个,第一个为任意类型第二个为String类型的所有类的所有的方法
2.设置通知,也就是在切面类里面的方法
在spring AOP里面有5中类型的通知
前置通知就是在目标方法执行之前执行,使用<aop:before method="func1" pointcut-ref="std"/>来设置 ,这样会找到其切面类里面对应的func1方法(根据method属性),通过pointcut-ref找到切入点这里是
<aop:pointcut id="std" expression="execution(* com.cqh.spring.demo.services.*.*(..))"/>
也就是只要能匹配上这个切入点表达式的方法在执行之前都会执行func1,而我们可以在func1里面决定是否继续执行目标方法
应用:一个用户发来一个请求,会调用查看用户信息的方法,需要权限的控制,而权限的控制不属于业务,因此就需要在切面授权,有权限放行继续执行查看用户信息的业务方法
否则不再执行
public void Auth(ProceedingJoinPoint point){        boolean authentic = false;        //查询是否有权限,代码省略
        if (authentic){            //放行
            try {
                point.proceed();//执行后面的通知或目标方法
            } catch (Throwable throwable) {
                throwable.printStackTrace();
            }
        }else{
            System.out.println("no privilege !!!!!!!");
        }
    }
后置通知在目标方法之后执行,无论目标方法是否发生异常都会执行,使用<aop:after method="" pointcut-ref="xxxx" />
返回后通知在目标方法成功执行后执行,使用<aop:after-returning method="func3" pointcut-ref="" returning="ret"/>
/**
     *
     * @param point
     * @param ret  目标方法的返回值     */
    public void func3(JoinPoint point, Object ret){

    }
环绕通知,在目标方法之前和目标方法执行之后都会执行。这里打印目标方法执行的时间就是用的环绕通知。
抛出异常后通知使用 <aop:after-throwing method="error" throwing="e" pointcut-ref="xxx"/>
/**
     *
     * @param point
     * @param e  目标方法抛出的异常     */
    public void error(JoinPoint point,Throwable e){

    }
到这基本的使用配置的方式就介绍完了。思考:怎么使用spring aop记录详细的日志,比如每个业务方法在调用时,记录如下信息:当前登录的用户 操作的业务 调用的方法,操作的时间给记录到数据库
原文出处:https://www.cnblogs.com/kin1492/p/9379621.html
共同学习,写下你的评论
评论加载中...
作者其他优质文章


