一、叨逼叨~
我们先回顾我们上个版本的App的功能有哪些,没看过那篇文章的童鞋们可以返回瞧瞧,然后再接着看下去哦~
大伙们看完之后会不会觉得只是单纯的截图里面的内容一览无余展示在了朋友圈,所以我决定将这个App升级功能,以满足大伙~,因为是临时想到的idear,所以我重新布局,喜欢的童鞋可以整合上个App,创建属于自己的移动应用哦~
二、新功能展示
1、一键分享微信不再只是朋友圈,你也可以发给你的朋友;
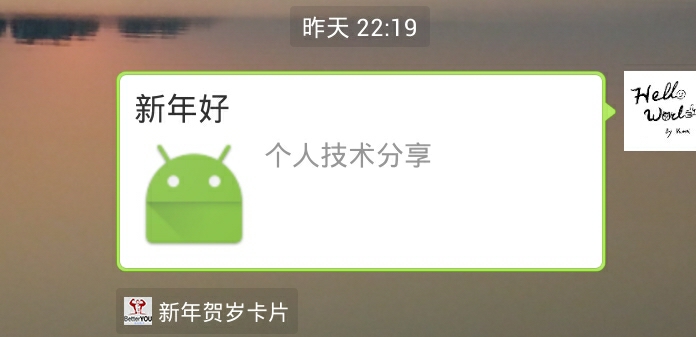
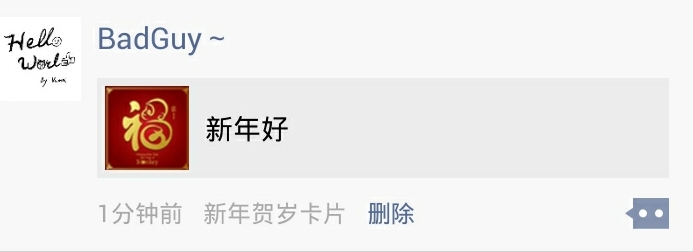
2、不再只是分享图片,我们分享的是一个URL,URL里面的内容为了跟慕课网接气,我采用了《HTML5+CSS3实现春节贺卡》这门课程的移动端web,接下来是图片效果(布局有点丑,咱就不要在意这点儿缺陷啦~)
三、XML布局
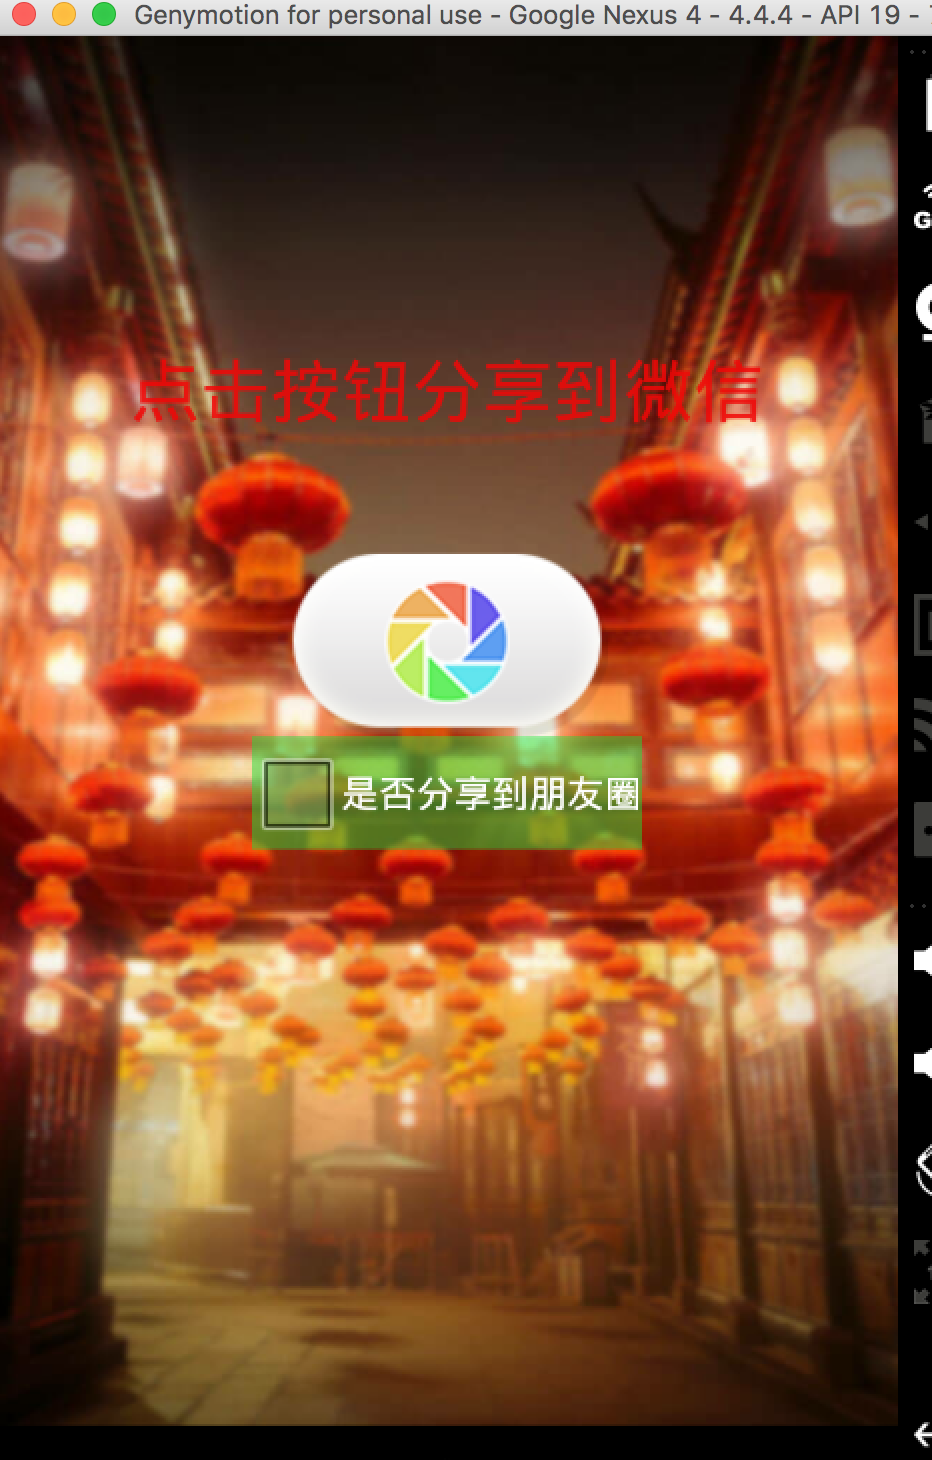
首先,因为这个app的主要是分享功能,所以xml我就比较随意~这个布局我们外层使用RelativeLayout布局,内层用LinearLayout布局,涉及到的控件包括了TextView、Button,这里我觉得大家都懂我就不一一讲解,有疑问的童鞋可以在下方评论区留言,代码如下:
<RelativeLayout xmlns:android="http://schemas.android.com/apk/res/android"
    xmlns:tools="http://schemas.android.com/tools"
    android:layout_width="match_parent"
    android:layout_height="match_parent"
    android:background="@drawable/p3_bg"
    >
    <LinearLayout
        android:layout_width="wrap_content"
        android:layout_height="wrap_content"
        android:orientation="vertical"
        android:layout_centerHorizontal="true"
        android:layout_marginTop="100dp">

        <TextView
            android:id="@+id/tv"
            android:text="点击按钮分享到微信"
            android:layout_width="wrap_content"
            android:layout_height="wrap_content"
            android:textSize="30sp"
            android:layout_centerHorizontal="true"
            android:layout_marginTop="30dp"
            android:textColor="#ddf10707"/>
        <Button
            android:layout_below="@id/tv"
            android:id="@+id/btn"
            android:layout_width="wrap_content"
            android:layout_height="wrap_content"
            android:background="@drawable/share"
            android:layout_centerHorizontal="true"
            android:layout_marginTop="50dp"
            android:layout_gravity="center"
            android:onClick="share"/>
        <CheckBox
           android:id="@+id/sure"
            android:text="是否分享到朋友圈"
            android:layout_width="wrap_content"
            android:layout_height="wrap_content"
            android:layout_gravity="center"
            android:background="#7b1ddf3e"/>
    </LinearLayout>

</RelativeLayout>
四、代码前的准备工作
这里因为涉及到第三方原因,所以我们首先去微信开放平台注册账号,创建自己的应用,这时候你会得到一组AppID,上一篇文章已经详细说明如何申请和一些细节,这里我们就跳过进入正题啦~
五、启动微信,测试是否正常工作
因为偷懒,我在xml里面button注册了onclick,这里我们直接在MainActivity里面实现点击事件的方法,调用
openWXApp()方法,然后在真机debug看看是否已经启动,为了直观,大家也可以用Toast打印
public void open(View view)
    {
        api.openWXApp();
    }
继续,我们将APP_ID声明为常量、IWXAPI、CheckBox
    public static final String APP_ID = "wx46f7d09d59a7f552";
    private IWXAPI api;
     private CheckBox mShareFriends;
接着在WXAPIFactory调用创建api的方法,分别传入上下文和一个id然后将APP_ID注册到微信中
        api = WXAPIFactory.createWXAPI(this,APP_ID);
        api.registerApp(APP_ID);
别忘了把CheckBox实例化,这里我们通过checkbox控制是否分享到朋友或者朋友圈
mShareFriends = (CheckBox) findViewById(R.id.sure);同样实现onclick方法在里面实现我们的功能逻辑,这里我们分为四步走
- 第一步 创建WXWebpageObject对象
       WXWebpageObject webpage = new WXWebpageObject();
        webpage.webpageUrl = "http://1.monkeycardyear.applinzi.com";
这里我们调用webpageUrl,然后传入我们要跳转的url
- 第二步 创建一个WXMediaMessage对象,并保存WXImageObject对象
        WXMediaMessage msg = new WXMediaMessage(webpage);
        msg.title = "新年好";
msg.description = "个人技术分享";- 第三步 设置缩略图,获取二进制图片
这里我们我们使用BitmapFactory.decodeResource()方法来从资源文件中读取一张图片并生成一个Bitmap,Bitmap thumb = BitmapFactory.decodeResource(getResources(),R.drawable.fu); msg.thumbData = bmpToByteArray(thumb, true);之前在评论区看到有人说大图片会溢出导致程序奔溃,那是因为Bitmap自身的特性(将每个像素的属性全部保存在内存中),导致稍有不慎就会创建出一个占用内存非常大的Bitmap对象,从而导致加载过慢,还会有内存溢出的风险,如果要优化这行代码大家可以调用decodeSampledBitmapFromResource这个方法,就可以做到在任意显示尺寸大小的UI元件中去载入一张位图
  public static Bitmap decodeSampledBitmapFromResource(Resources res, int resId,
        int reqWidth, int reqHeight)
这里我们写个方法将缩略图转化成二进制
    private byte[] bmpToByteArray(final Bitmap bitmap,final boolean needRecycle)
    {
        ByteArrayOutputStream out = new ByteArrayOutputStream();
        bitmap.compress(Bitmap.CompressFormat.PNG,100,out);
        if (needRecycle)
        {
            bitmap.recycle();
        }
        byte[] result = out.toByteArray();
        try {
            out.close();
        } catch (IOException e) {
            e.printStackTrace();
        }
        return  result;
    }
final boolean needRecycle 判断是否要释放图片占用的内存资源
第四步、创建一个为请求客户端SendMessageToWX.Req对象,我们通过唯一标识接收WXMediaMessage对象发送过来的消息
SendMessageToWX.Req req = new SendMessageToWX.Req();
        req.transaction = builtTransition("webpage");
        req.message = msg;
这里我们写一个唯一标识的方法
    private String builtTransition(final String type)
    {
        return (type==null)?String.valueOf(System.currentTimeMillis()):type+System.currentTimeMillis();
    }
接下来我们需要设置场景,判断是分享到朋友还是朋友圈
 req.scene = mShareFriends.isChecked()?SendMessageToWX.Req.WXSceneTimeline
                :SendMessageToWX.Req.WXSceneSession;
最后再调用api.sendReq(req),这里我直接把结果Toast出来,如果发送成功会弹出true
Toast.makeText(MainActivity.this, String.valueOf(api.sendReq(req)),Toast.LENGTH_SHORT).show();这样整个App就完成了,谢谢大家
P.S我把整个移动端web项目挂到了新浪云,大家也可以试试腾讯云或者阿里云,这里只是讲解接入微信分享就不详述移动端web,可以到课程首页学习学习,最后附上几张效果图~
源码地址:github地址:https://github.com/lynhao (即将上传,欢迎大家fork~)
大家也可以到我的社区源码同样会上传~
共同学习,写下你的评论
评论加载中...
作者其他优质文章


