【九月打卡】第3天 【2022版】Vue2.5-2.6-3.0开发去哪儿网App 零基础入门到实战 第四讲
课程章节: 深入理解 Vue 组件
主讲老师: Dell
课程内容:
今天学习的内容包括:
有了组件之后,前端的工程化和开发难度都得到有效降低
组件传值,要求遵循单项数据流的原则
课程收获:
4.1 心得:
is属性能规避html中严格规定结构的dom渲染bug,比如table,ul,ol。
子组件因为data使用函数所以多个子组件所用的data不会互相污染。
有些html标签如table,ul,ol,select对哪些标签可以出现在其内部是有着严格的要求的。因此当这些标签内部出现了自定义组件,有可能会被作为无效的内容提升到外部,导致页面渲染出错。
而是用is属性则可以解决这个问题,在子级标签中用is属性来使用自定义组件。
注意:子组件中的data必须是一个函数,并且返回一个对象,当一个组件被多次使用的时候,组件间的数据不会相互影响。
refs属性 写在一般标签上获取DOM元素 写在组件标签获取子组件的引用。在标签上是ref,在实例使用是$refs(例子:计数器)
示例代码:
<div id="app">
        <counter ref='one' @change='handleChange'></counter>
        <counter ref='two' @change='handleChange'></counter>
        <div>{{total}}</div>
    </div>
    <script>
        var counter = {
            template: '<div @click="handleBtnClick">{{number}}</div>',
            data: function () {
                return {
                    number: 0
                };
            },
            methods: {
                handleBtnClick: function () {
                    this.number++;
                    this.$emit('change', this.number);//$emit
                }
            }
        }
        var vm = new Vue({
            el: '#app',
            data: {
                total:0
            },
            components: {
                counter: counter
            },
            methods: {
                handleChange: function () {
                    console.log(this.$refs.one);//子组件的引用
                    console.log(this.$refs.two);
                    this.total = this.$refs.one.number+this.$refs.two.number;
                }
            }
        })
4.2 心得:
组件声明方式:
局部组件:var counter = { template: "<div>0</div>" } 使用前,需要在component中声明
全局组件:使用前不需要声明 Vue.component('counter',{template: "<div>0</div>" })
父组件和子组件:将某段代码封装成一个组件,而这个组件在另一个组件中引入,引用它的是父组件,被引用的是子组件。
父组件通过属性(props)的方式向子组件传值,子组件通过$emit事件触发向父组件传值。
父传子:其中,props属性用于子组件从父组件接收数据(子组件也可以向后台发送接口获取数据,但这样会给服务器造成压力,因此我们用props属性获取数据)。
<counter :count="0" @inc="handelInc"></counter>    //  不加:传递的是字符串,加:传递的是js表达式
<counter :count="0" @inc="handelInc"></counter>    //  @ 监听子组件的事件
<div>{{total}}</div>
子传父:$emit用于父组件监听子组件事件,并获取子组件传来的附加参数(不定长的数组,可以是多参数,参数可作为父组件所触发事件的参数),触发该监听事件上绑定的事件。
单项数据流:父组件可以向子组件传数据,但子组件不能改变父组件的原数据,如需修改,要克隆一份,更改副本。下面的例子中,直接在method里count++是错误的,先在data里将count克隆到number,再改变子组件中的number。
var counter ={
    props: ['count'],        //    子组件通过props接收父组件传递过来的数据
    data: function() {
            return {
                number: this.count    //定义一个数据接收父组件的数据再修改
                }
            }
        }
    template:'<div @click="handelClick">{{number}}</div>',
    methods:{
        handelClick:function(){
            this.number = this.number + 2 ;
            this.$emit('inc',2)    //  2、子组件通过事件触发的方式向父组件传值
        }
    }
}
var vm = new Vue({
    el:'#root',
    data:{
        total:5
    },
    components:{
        counter:counter
    },
    methods:{
        handelInc:function(step){    //父组件监听到子组件传过来的参数step为2
            this.total += step
        }
    }
})
4.3 心得:
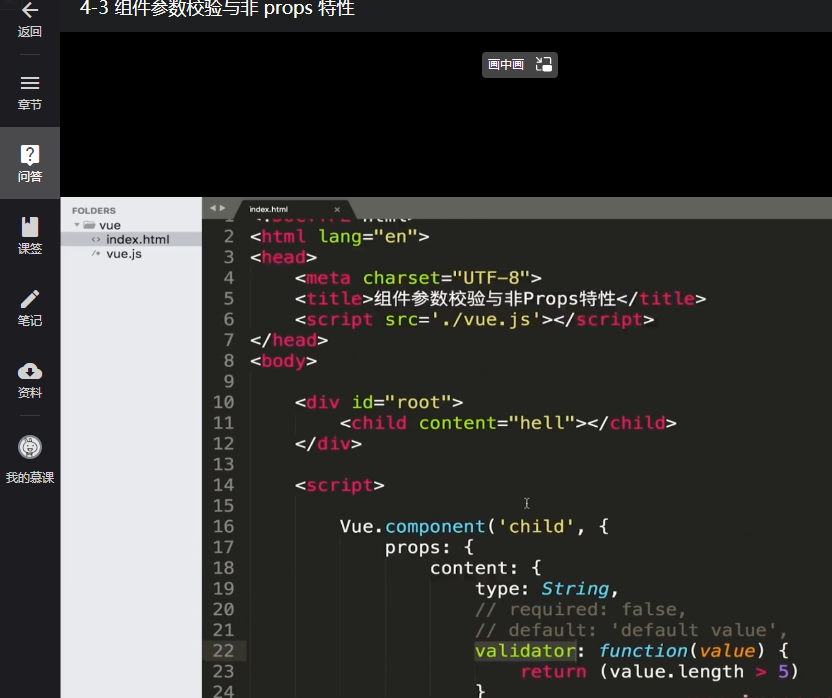
组件参数校验和非props特性
可以将props写成对象的形式,对象的键为接收的参数名
子组件接收的content属性必须是字符串类型
props:{content:String}
子组件接收的content属性要么是数字,要么是字符串
props:{
content: [ String , Number ]
}
content后面不仅仅可跟Number,String,数组,还可以跟对象
props:{
    content:{
        type:String, //传入的类型必须是String
        required:true //子组件接收的content属性是必传的
        default:'default value' //如果父组件不传content,则default生效(默认值),子组件内容默认是defaultvalue
        validator: function(value) { return (value.length > 5 )
    }
},
props 特性是父组件传递了这个参数,子组件声明并接收了这个参数
非props特性是指父组件传递了这个参数,但子组件未声明,所以无法接收直接使用
但会出现在自组件的最外层的dom结构的标签的属性中。
4.4 心得:
在div元素上绑定的事件指的是监听的原生事件
Vue.component('child',{
template:'<div @click="handleChildClick">Child</div>',
methods:{
handleChildClick:function() {
alert('child click')
}
}
})
在child上绑定的事件指的是监听的自定义事件
<child @click="handleClick"></child>
调用this.$emit(‘方法名’)去触发自定义事件
Vue.component('child',{
template:'<div @click="handleChildClick">Child</div>'
methods:{
handleChildClick:function() {
this.$emit('click')
}
}
})
var vm = new Vue({
el:'#root',
methods:{
handleClick:function () {
alert('click')
}
}
})
子组件监听到自身div元素被点击,向外触发自定义事件,在父组件中监听了自定义事件,对应的
handleClick就会被执行
给组件绑定原生事件
@click.native="handleclick" //监听的不是自定义事件 而是原生的点击事件
4.5 心得:
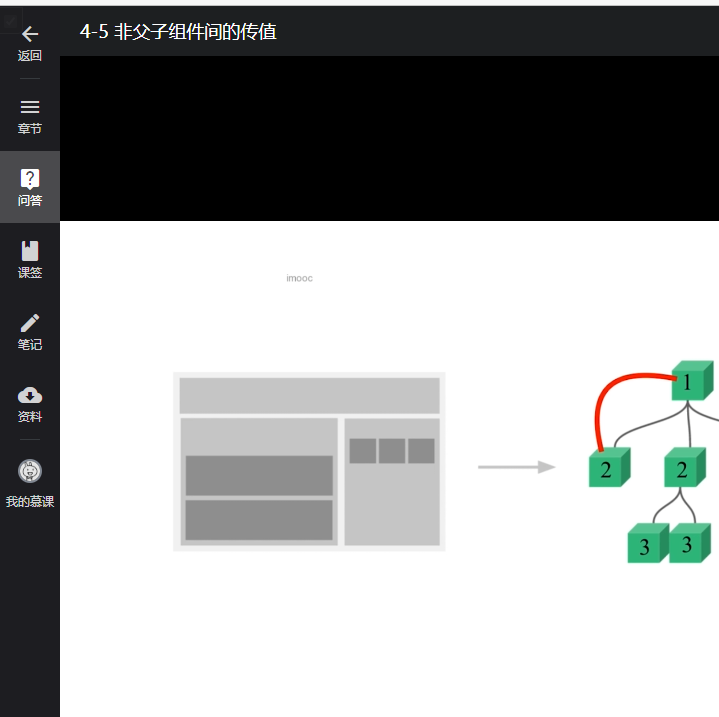
非父子组件传值:
方法:Vuex、总线机制(Bus/总线/发布订阅模式/观察者模式)
Vue.prototype.bus = new Vue()给Vue的prototype绑定了一个bus,将每一个Vue实例赋值给原型属性bus。
Vue.prototype.bus = new Vue();
        Vue.component('child', {
            props: {
                content: String
            },
            data: function () {
                return {
                    newContent: this.content
                }
            },
            template: '<div @click="handleClick">{{newContent}}</div>',
            methods: {
                handleClick: function () {
                    this.bus.$emit('change', this.content);
                }
            },
            mounted: function () {
                var _this = this;
                console.log(this);//this->vue.component
                this.bus.$on('change', function (msg) {//$on监听事件
                    console.log(msg);//msg是传递来的内容
                    console.log(this);//this->vue.bus
                    // _this.content = msg(×) 子组件不能强改父组件内容,回去定义data
                    _this.newContent = msg;
                })
            }
        })
review:this
函数调用时会自动获取this,不管声明在哪里,this都会对应动态绑定的对象。
个人感受:函数中的this绑定到它的最大函数的作用域
默认绑定:在全局范围使用的函数
function global(){
    console.log(this) //window
}
global();
隐式绑定:在对象中使用的函数
var obj = {
    a:1,
    b:function(){
        console.log(this) //obj
        console.log(this.a) //1
    }
}
obj.b();
//extension
    var c=obj.b;
    c(); //window undefined(全局this获取不到a)
构造绑定:在构造函数中使用的函数
function Bird(name){
    this.name = name;
    console.log(this.name);
}
Bird('hello'); //hello
4.6 心得:
在Vue中使用插槽
通过插槽可以更方便的向子组件传递dom元素,子组件使用插槽的内容也非常简单
插槽还可以定义默认值
<slot>默认内容</slot>
可以使用具名插槽使用不同的dom结构
<body-content>
<div class="header" slot="header">header</div>
<div class="footer" slot=""footer>footer</div>
</body-content>
Vue.component('body-content',{
template:'<div>
<slot name="footer"></slot>
<div class="content">content</div>
<slot name="footer"></slot>
</div>'
})
4.7 心得:
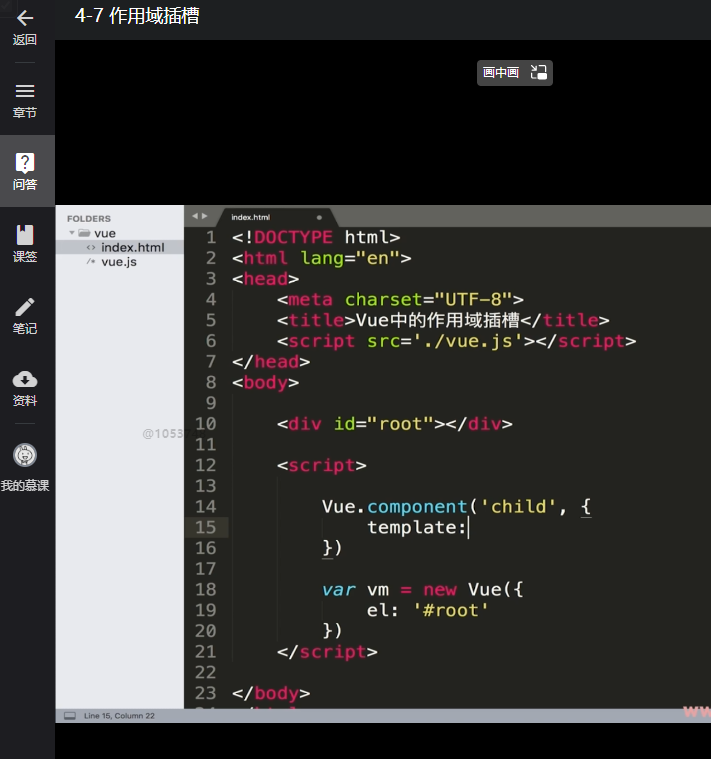
Vue中的作用域插槽
当子组件做循环,或某一部分的dom结构需要从外面传过来(让外部插槽内容访问子组件才有的数据)。
子组件向父组件插槽传数据,父组件想接收数据,必须在外层使用template,定义slot-scope属性的名字,接收传过来的数据。(slot-scope)语法已废弃。
新方法:在子组件或template上用v-slot来定义插槽prop的名字(v-slot只能用绑定在子组件或template上)。绑定在 元素上的 attribute 被称为插槽 prop。
简单理解,v-slot相当于原来的slot-scope,在父元素中给某作用域指定名字,从而方便调用作用域内的变量。
未指名的内容对应默认插槽,即覆盖该插槽里的所有内容
<content>
    <div>
        <template v-slot=‘slotName'>
        </template>
    </div>
 </content>
4.8 心得:
动态组件与once指令
点击change键可以实现child-one 和child-two互相展示隐藏的效果
<div id="root">
<child-one v-if="type === 'child-one'"></chile-one>
<child-two v-if="type === child-two"></child-two>
<button @click="handleBtnClick">change</button>
</div>
Vue.component('child-one', {
template:'<div>child-one</div>'
})
Vue.component('child-two', {
template:'<div>child-two</div>'
})
var vm = new Vue({
el:'#root',
data:{
type:'child-one' //默认值
}
methods:{
handleBtnClick:function() {
this.type = this.type === 'child-one' ? 'child-two' : 'child-one'
}
}
})
动态组件
component 是vue自带的标签 指的是动态组件
动态组件:会根据is里数据的变化自动地加载不同的组件
<div id="root">
<component :is="type"></component> //is绑定数据type
<button @click="handleBtnClick">change</button>
</div>
v-once指令
只对内部模板渲染一次(即只按第一次渲染来展示)
var vm = new Vue({
el:'#root',
data:{
type:'child-one' //默认值
},
template:'<div v-once>//写模板外层必须加div标签
<child-one v-if="type === 'child-one'"></chile-one>
<child-two v-if="type === child-two"></child-two>
<button @click="handleBtnClick">change</button>
</div>'
methods:{
handleBtnClick:function() {
this.type = this.type === 'child-one' ? 'child-two' : 'child-one'
}
}
})
共同学习,写下你的评论
评论加载中...
作者其他优质文章


