背景
由于微信默认的tabbar是官方组件,有最高的优先级,因此我们自己组件的遮罩层无法覆盖他们。为了解决这个问题,我们可以使用微信提供的自定义tabBar功能。
官方文档:developers.weixin.qq.com/miniprogram…
实现效果:
实现方式
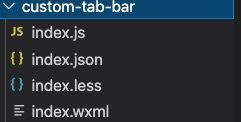
在项目根目录下创建custom-tab-bar组件,文件名为index,如图
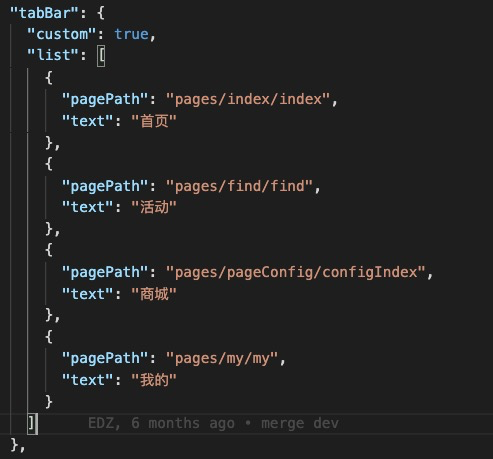
在app.json中把tabBar设置为自定义,这里的list必须要定义,否者会报错
编写tabbar代码
wxml:
<view class="bar">
<view class="bar__item {{ index == selected ? 'bar__active' : '' }}" wx:for="{{list}}" wx:key="index" bind:tap="handleClick" data-index="{{ index }}" data-path="{{ item.pagePath }}">
<image class="lazyload" src="data:image/png;base64,iVBORw0KGgoAAAANSUhEUgAAAAEAAAABCAYAAAAfFcSJAAAAAXNSR0IArs4c6QAAAARnQU1BAACxjwv8YQUAAAAJcEhZcwAADsQAAA7EAZUrDhsAAAANSURBVBhXYzh8+PB/AAffA0nNPuCLAAAAAElFTkSuQmCC" data-original="{{ index == selected ? item.selectedIconPath : item.iconPath }}" mode="aspectFit" class="bar__img" />
<view class="bar__text">{{ item.text }}</view>
</view>
</view>
js:
Component({
data: {
selected: 0,
list: [
{
"iconPath": "/static/tabbar/index.png",
"selectedIconPath": "/static/tabbar/index2.png",
"pagePath": "/pages/index/index",
"text": "首页"
},
{
"iconPath": "/static/tabbar/activity.png",
"selectedIconPath": "/static/tabbar/activity2.png",
"pagePath": "/pages/find/find",
"text": "活动"
},
{
"iconPath": "/static/tabbar/mall.png",
"selectedIconPath": "/static/tabbar/mall2.png",
"pagePath": "/pages/pageConfig/configIndex",
"text": "商城"
},
{
"iconPath": "/static/tabbar/my.png",
"selectedIconPath": "/static/tabbar/my2.png",
"pagePath": "/pages/my/my",
"text": "我的"
}
]
},
methods: {
handleClick(e) {
let path = e.currentTarget.dataset.path;
let index = e.currentTarget.dataset.index;
wx.switchTab({ url: path })
this.setData({ selected: index })
}
}
});
wxss 特别说明:自定义的tabbar层级默认为9999(非官方说明,自己测出的结果),我这里使用的less,会编译为wxss。
.bar {
position: absolute;
bottom: 0;
left: 0;
right: 0;
height: 50px;
display: flex;
justify-content: space-around;
background-color: #fff;
padding-bottom: env(safe-area-inset-bottom);
&__item {
display: flex;
flex-direction: column;
align-items: center;
justify-content: center;
}
&__img {
width: 24px;
height: 24px;
margin-bottom: 2px;
}
&__text {
font-size: 10px;
}
&__active {
.bar__text {
color: #487271;
}
}
}
json:
{
"component": true,
"usingComponents": {}
}
完成上面的步骤,tarbar组件就写完了,接下来是使用了
使用自定义tabBar
这个组件不需要手动注册,在list中定义的页面会自动加载这个组件。但是需要通过下面的方法手动指定高亮的选项:
// 建议在onShow方法中调用,selected 值为索引值
onShow() {
this.getTabBar().setData({ selected: 0 })
}
处理padding值
由于使用了自定义tabbar,因此需要对使用tababr的页面设置下内边距,以防止内容被覆盖。可以在app.wxss中定义一个全局样式,然后在对应的页面添加这个类名即可。
.global__fix_tabbar {
padding-bottom: calc(100rpx + env(safe-area-inset-bottom));
}
最终效果
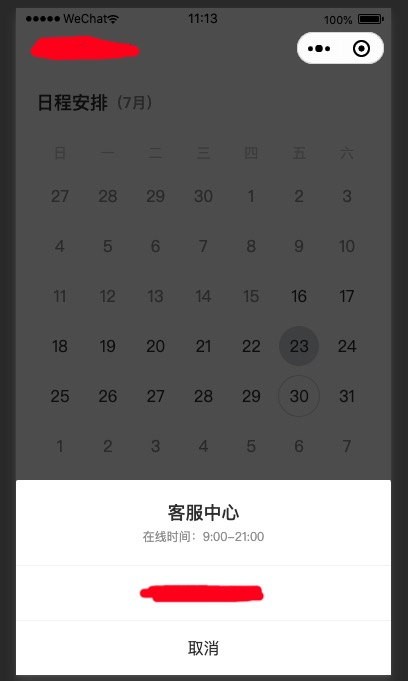
我们的小程序使用vant-weapp组件库,对于popup组件,设置更高的层级,就可以覆盖tabbar了
<!-- z-index="99999" -->
<van-popup
show="{{ showPhone }}"
round
custom-class="custom"
z-index="99999"
position="bottom"
bind:click-overlay="onClosePhone"
catchtouchmove="ture"
>
</van-popup>
效果如图:
作者:wmui
链接:https://juejin.cn/post/6987958137743474725
来源:掘金
著作权归作者所有。商业转载请联系作者获得授权,非商业转载请注明出处。
共同学习,写下你的评论
评论加载中...
作者其他优质文章


