不知你注意或是没注意组件的
shape属性,
可能你觉得没啥用,或说一带而过,今天就来掰扯一下这个ShapeBorder对象
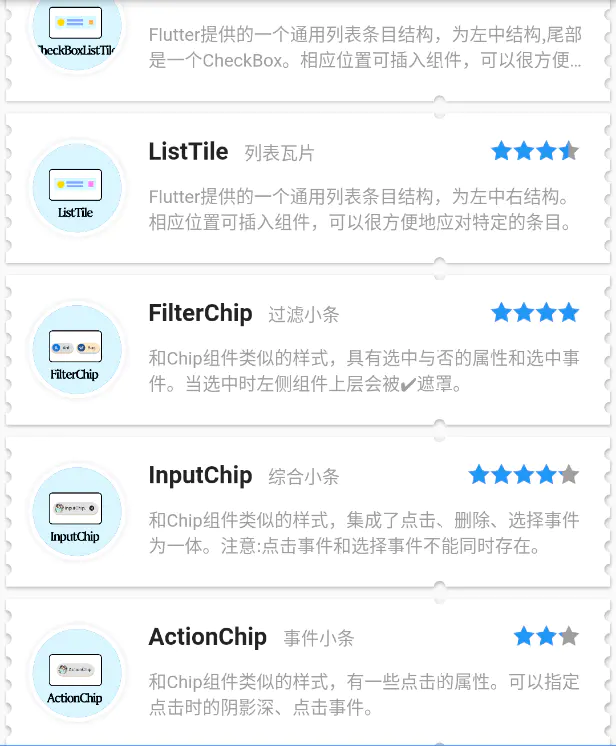
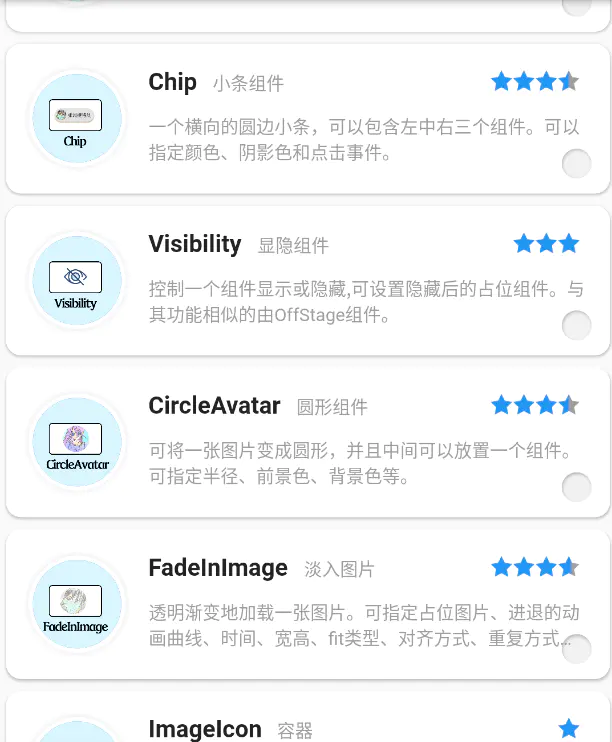
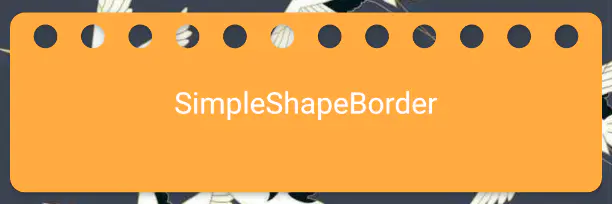
它的强大远远超出你的想象,不过记住:Path 在手,天下我有,先看下效果
打洞
header 1
header 2
Material
Card
FloatingActionButton
RawMaterialButton
MaterialButton
    |----FlatButton
    |----RaisedButton
    |----OutlineButton
...

ClipPath
一、shape属性 对应的几类对象
shape 对应 ShapeBorder 对象 , 它的子类如下:

ShapeBorder [abstract]
|---BoxBorder [abstract]
    |---BorderDirectional
    |---Border
|---RoundedRectangleBorder
|---ContinuousRectangleBorder
|---CircleBorder
|---InputBorder [abstract]
    |---OutlineInputBorder
    |---UnderlineInputBorder
1.从Material组件开始说起
估计这个组件用的人不多,但是翻看一下源码
Card,RawMaterialButton及子族
它们的shape属性都来自于Material组件,可以说是它是shape的本宗,所以擒贼先擒王
下面是一个Material组件基本使用的demo:
  Widget _buildNoShape() {
    return Material(
              color: Colors.orangeAccent,
              elevation: 10,
              child: Container(
                alignment: Alignment.center,
                padding: EdgeInsets.all(10),
                height: 80,
                child: Text(
                  "No Shape",
                  style: TextStyle(color: Colors.white, fontSize: 20),
                ),
              ),
            );
  }
2 BoxBorder$BorderDirectional 与 BoxBorder$Border
BoxBorder主要掌管边线方面的事,自身是abstract,不能直接用
BorderDirectional 通过【top】【bottom】【start】【end】分别控制上下左右的边线
边线对象BorderSide
Widget _buildBorderDirectional() {
  return Material(
            color: Colors.orangeAccent,
            shape: BorderDirectional(
                top: BorderSide(
                  color: Colors.white,
                ),
                start: BorderSide(
                  color: Colors.black,
                  width: 15
                ),
              bottom: BorderSide(
                color: Colors.white,
              )
            ),
            elevation: 2,
            child: Container(
              alignment: Alignment.center,
              padding: EdgeInsets.all(10),
              height: 80,
              child: Text(
                "BorderDirectional",
                style: TextStyle(color: Colors.white, fontSize: 20),
              ),
            ),
          );
}
Border 通过
【top】【bottom】【left】【right】分别控制上下左右的边线
本质上和BorderDirectional并没有什么区别
Widget _buildBorder() {
  return Material(
    color: Colors.orangeAccent,
    shape: Border(
      top: BorderSide(width: 5.0, color: Color(0xFFFFDFDFDF)),
      left: BorderSide(width: 5.0, color: Color(0xFFFFDFDFDF)),
      right: BorderSide(width: 5.0, color: Color(0xFFFF7F7F7F)),
      bottom: BorderSide(width: 5.0, color: Color(0xFFFF7F7F7F)),
    ),
    elevation: 10,
    child: Container(
      alignment: Alignment.center,
      padding: EdgeInsets.all(10),
      height: 80,
      child: Text(
        "Border",
        style: TextStyle(color: Colors.white, fontSize: 20),
      ),
    ),
  );
}
3 CircleBorder
CircleBorder 会以min(with,height) 为直径,裁处一个圆形
Widget _buildCircleBorder() {
  return Material(
    color: Colors.orangeAccent,
    shape: CircleBorder(
      side: BorderSide(width: 2.0, color: Color(0xFFFFDFDFDF)),
    ),
    elevation: 2,
    child: Container(
      alignment: Alignment.center,
      padding: EdgeInsets.all(10),
      height: 80,
      child: Text(
        "Circle",
        style: TextStyle(color: Colors.white, fontSize: 20),
      ),
    ),
  );
}
4 RoundedRectangleBorder和ContinuousRectangleBorder
圆角类矩形
Widget _buildRoundedRectangleBorder() {
  return Material(
    color: Colors.orangeAccent,
    shape: RoundedRectangleBorder(
        side: BorderSide(width: 1.0, color: Colors.black),
        borderRadius: BorderRadius.all(Radius.circular(15))),
    elevation: 2,
    child: Container(
      alignment: Alignment.center,
      padding: EdgeInsets.all(10),
      height: 80,
      child: Text(
        "RoundedRectangleBorder",
        style: TextStyle(color: Colors.white, fontSize: 20),
      ),
    ),
  );
}
Material _buildContinuousRectangleBorder() {
  return Material(
    color: Colors.orangeAccent,
    elevation: 2,
    shape: ContinuousRectangleBorder(
      side: BorderSide.none,
      borderRadius: BorderRadius.circular(40.0),
    ),
    child: Container(
      alignment: Alignment.center,
      padding: EdgeInsets.all(10),
      height: 80,
      child: Text(
        "ContinuousRectangleBorder",
        style: TextStyle(color: Colors.white, fontSize: 20),
      ),
    ),
  );
}
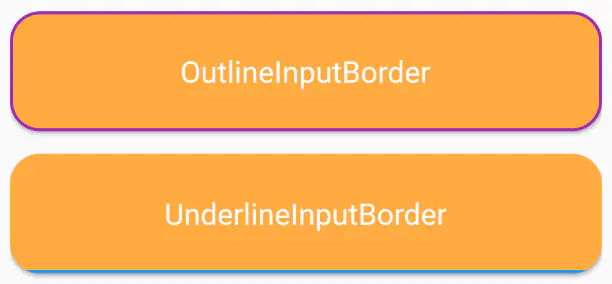
5 OutlineInputBorder和UnderlineInputBorder
常用与输入框的边线
Material _buildOutlineInputBorder() {
  return Material(
    color: Colors.orangeAccent,
    elevation: 2,
    shape: OutlineInputBorder(
      borderSide: BorderSide(width: 2.0, color: Colors.purple),
      borderRadius: BorderRadius.circular(20.0),
    ),
    child: Container(
      alignment: Alignment.center,
      padding: EdgeInsets.all(10),
      height: 80,
      child: Text(
        "OutlineInputBorder",
        style: TextStyle(color: Colors.white, fontSize: 20),
      ),
    ),
  );
}

Material _buildUnderlineInputBorder() {
  return Material(
    color: Colors.orangeAccent,
    elevation: 2,
    shape: UnderlineInputBorder(
      borderSide: BorderSide(width: 5.0, color: Colors.blue),
      borderRadius: BorderRadius.circular(20),
    ),
    child: Container(
      alignment: Alignment.center,
      padding: EdgeInsets.all(10),
      height: 80,
      child: Text(
        "UnderlineInputBorder",
        style: TextStyle(color: Colors.white, fontSize: 20),
      ),
    ),
  );
}
这样Flutter内置的形状就over了,好了,引言结束,下面开始正题。
二、自定义ShapeBorder
1.继承ShapeBorder
一共有五个抽象方法
class SimpleShapeBoder extends ShapeBorder{
  @override
  EdgeInsetsGeometry get dimensions => null;

  @override
  Path getInnerPath(Rect rect, {TextDirection textDirection}) {
    return null;
  }

  @override
  Path getOuterPath(Rect rect, {TextDirection textDirection}) {
    return null;
  }

  @override
  void paint(Canvas canvas, Rect rect, {TextDirection textDirection}) {
  }

  @override
  ShapeBorder scale(double t) {
    return null;
  }

}
2. paint方法
看到paint中的Canvas对象,心想:
又到装13的机会了
先瞄一眼这个rect对象的信息:
@override
void paint(Canvas canvas, Rect rect, {TextDirection textDirection}) {
  print(rect.toString());
}
I/flutter ( 8697): Rect.fromLTRB(0.0, 0.0, 395.4, 80.0)
表明可以直接拿到组件的区域,然后…为所欲为吧
先画个小圆以表敬意: 这表示你可以通过shape属性来在一个组件上画任意的东西
如果有耐心画幅清明上河图也不成问题。paint是不是非常强大?
  @override
  void paint(Canvas canvas, Rect rect, {TextDirection textDirection}) {
    var paint = Paint()
      ..color = Colors.white
      ..strokeWidth = 2.0
      ..style = PaintingStyle.stroke
      ..strokeJoin = StrokeJoin.round;
    var w = rect.width;
    var h = rect.height;
    canvas.drawCircle(Offset(0.3*h,0.23*h), 0.12*h, paint);
    canvas.drawCircle(Offset(0.3*h,0.23*h), 0.06*h, paint..style=PaintingStyle.fill..color=Colors.black);
  }
getOuterPath 返回一个Path对象,也就是形状的裁剪,这个更厉害
先来看圆角怎么切: 用path.addRRect来添加一个圆角矩形,然后就出现效果了
  @override
  Path getOuterPath(Rect rect, {TextDirection textDirection}) {
    var path = Path();
    path.addRRect(RRect.fromRectAndRadius(rect, Radius.circular(10)));
    return path;
  }
3. getOuterPath方法
来打个洞吧。 下面根据位置计算出一个圆形路径
将圆角矩形和圆形两个路径叠加,最后使用奇偶环绕来处理路径
关于路径Path的环绕规则已经其他的东西,可以看以前写的Android的路径文章
Android关于Path你所知道的和不知道的一切-填充的环绕原则
@override
Path getOuterPath(Rect rect, {TextDirection textDirection}) {
  var path = Path();
  path.addRRect(RRect.fromRectAndRadius(rect, Radius.circular(10)));

  var w = rect.width;
  var h = rect.height;
  var radius = 0.2*h;
  var pl= 0.1*h;
  var pt= 0.1*h;
  var left = w - radius - pl;
  var top = pt;
  var right = left + radius;
  var bottom = top + radius;
  path.addOval(Rect.fromLTRB(left, top, right, bottom));
  path.fillType = PathFillType.evenOdd;

  return path;
}
就此来封装一个打洞的形状
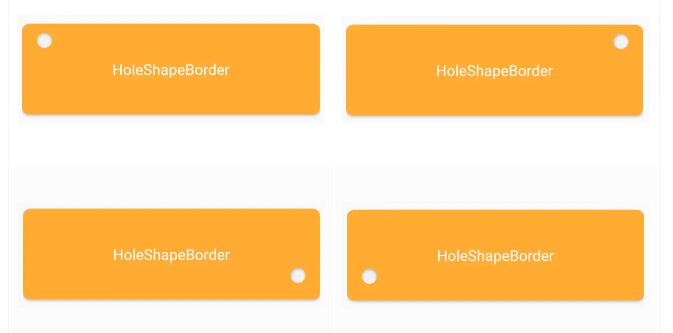
HoleShapeBorder,可指定洞的大小和偏移分率
这样洞在组件之间就可以随意移动
打洞
import 'package:flutter/material.dart';

/// create by 张风捷特烈 on 2020-03-06
/// contact me by email 1981462002@qq.com
/// 说明: 打个洞
/// offset 洞的偏移量分率 x,y 在 0~1 之间
/// size 洞的大小

class HoleShapeBorder extends ShapeBorder {
  final Offset offset;
  final double size;


  HoleShapeBorder({this.offset=const Offset(0.1, 0.1), this.size=20});

  @override
  EdgeInsetsGeometry get dimensions => null;

  @override
  Path getInnerPath(Rect rect, {TextDirection textDirection}) {
    var path = Path();
    path.addRRect(RRect.fromRectAndRadius(rect, Radius.circular(5)));
    return path;
  }

  @override
  Path getOuterPath(Rect rect, {TextDirection textDirection}) {
    var path = Path();
    path.addRRect(RRect.fromRectAndRadius(rect, Radius.circular(10)));


    var w = rect.width;
    var h = rect.height;
    var offsetXY = Offset( offset.dx*w,offset.dy*h);
    var d = size;
    _getHold(path, 1, d, offsetXY);
    path.fillType = PathFillType.evenOdd;
    return path;
  }

  _getHold(Path path, int count, double d, Offset offset) {
      var left = offset.dx;
      var top = offset.dy;
      var right = left + d;
      var bottom = top + d;
      path.addOval(Rect.fromLTRB(left, top, right, bottom));
    }

  @override
  void paint(Canvas canvas, Rect rect, {TextDirection textDirection}) {
  }

  @override
  ShapeBorder scale(double t) {
    // TODO: implement scale
    return null;
  }
}
  Material _buildHoleShapeBorder() {
    return Material(
      color: Colors.orangeAccent,
      shape: HoleShapeBorder(
        size: 20,
        offset: Offset(0.05,0.1)
      ),
     //英雄所见...
  }
既然能打一个洞,那也可以多打几个洞
把相关的属性抽离一下,做的打洞ShapeBorder岂不更香
  @override
  Path getOuterPath(Rect rect, {TextDirection textDirection}) {
    var path = Path();
    path.addRRect(RRect.fromRectAndRadius(rect, Radius.circular(10)));
    var w = rect.width;
    var h = rect.height;
    var holeCount = 12;
    var d = w / (1 + 2 * holeCount);
    _getHold(path, holeCount, d, 8);
    path.fillType = PathFillType.evenOdd;
    return path;
  }

  _getHold(Path path, int count, double d, double pt) {
    for (int i = 0; i < count; i++) {
      var left = d + 2 * d * i;
      var top = pt;
      var right = left + d;
      var bottom = top + d;
      path.addOval(Rect.fromLTRB(left, top, right, bottom));
    }
  }
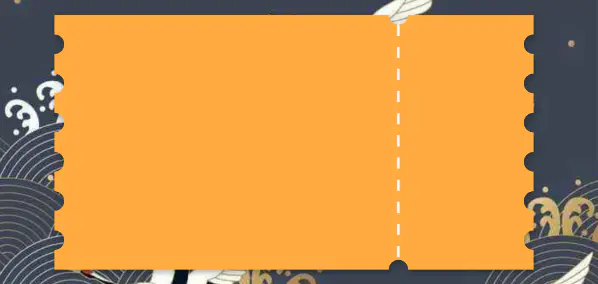
3.手撕优惠券
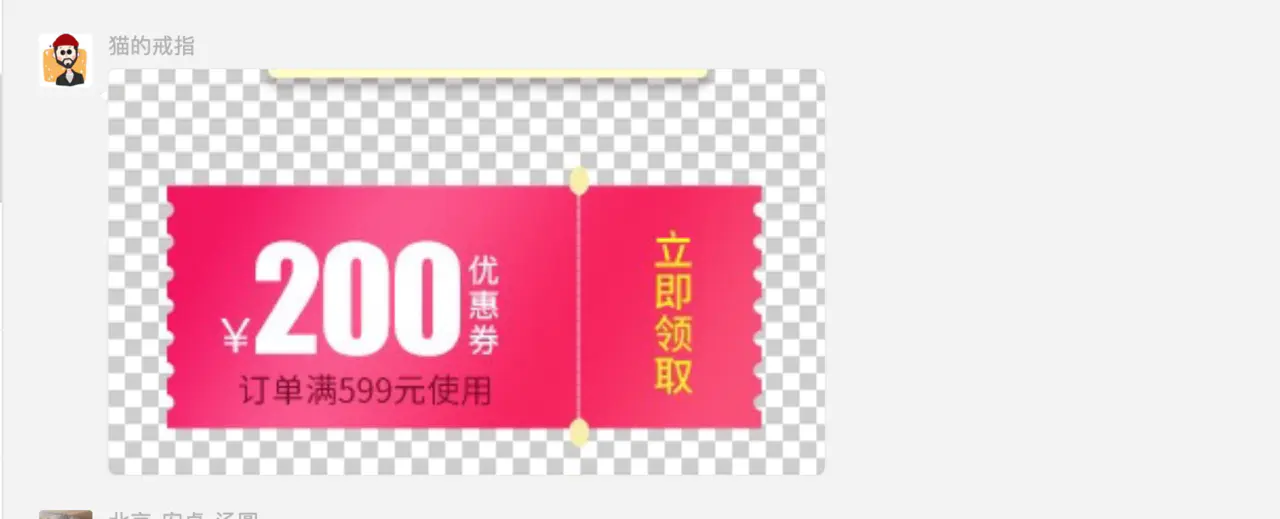
群里有个哥们提了一句,看能不能做一个优惠券:
Path在手,就是可以为所欲为,废话不多说,开搞
核心方法和上面类似,但涉及到路径操作还有些注意点
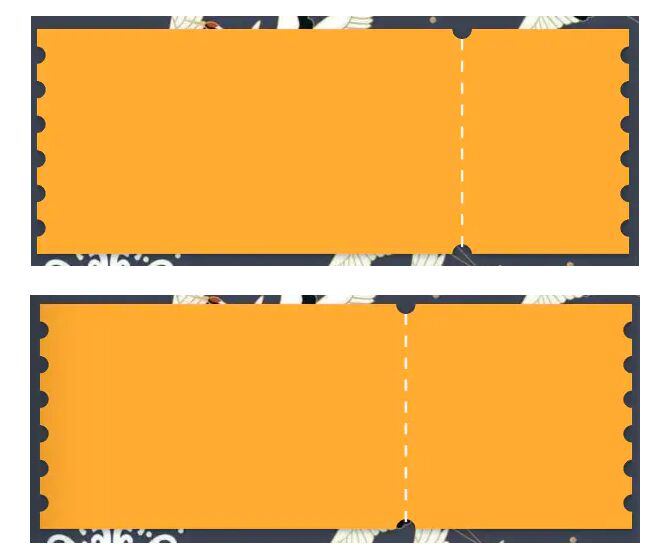
通过洞的个数和宽度来确定洞的直径,这样会避免最边上的尴尬,适配性更加
lineRate来确定白线的分率位置(0,1) 下面两幅分别是0.718和0.618
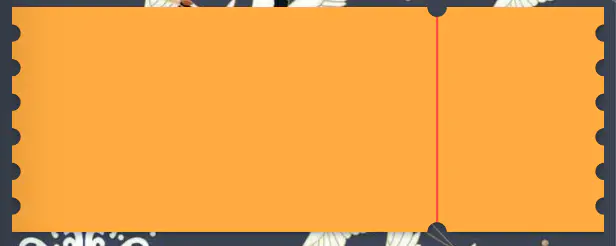
dash是否是虚线,color 为线的颜色
适应宽高: 分率线和小圆半径都会根据宽高自动进行更改
class CouponShapeBorder extends ShapeBorder {
  final int holeCount;
  final double lineRate;
  final bool dash;
  final Color color;

  CouponShapeBorder(
      {this.holeCount = 6,
      this.lineRate = 0.718,
      this.dash = true,
      this.color = Colors.white});

  @override
  EdgeInsetsGeometry get dimensions => null;

  @override
  Path getInnerPath(Rect rect, {TextDirection textDirection}) {
    return null;
  }

  @override
  Path getOuterPath(Rect rect, {TextDirection textDirection}) {
    var w = rect.width;
    var h = rect.height;

    var d = h / (1 + 2 * holeCount);

    var path = Path();
    path.addRect(rect);

    _formHoldLeft(path, d);
    _formHoldRight(path, w, d);
    _formHoleTop(path, rect);
    _formHoleBottom(path, rect);
    path.fillType = PathFillType.evenOdd;

    return path;
  }

  void _formHoleBottom(Path path, Rect rect) {
    path.addArc(
        Rect.fromCenter(
            center: Offset(lineRate * rect.width, rect.height),
            width: 13.0,
            height: 13.0),
        pi,
        pi);
  }

  void _formHoleTop(Path path, Rect rect) {
    path.addArc(
        Rect.fromCenter(
            center: Offset(lineRate * rect.width, 0),
            width: 13.0,
            height: 13.0),
        0,
        pi);
  }

  _formHoldLeft(Path path, double d) {
    for (int i = 0; i < holeCount; i++) {
      var left = -d / 2;
      var top = 0.0 + d + 2 * d * (i);
      var right = left + d;
      var bottom = top + d;
      path.addArc(Rect.fromLTRB(left, top, right, bottom), -pi / 2, pi);
    }
  }

  _formHoldRight(Path path, double w, double d) {
    for (int i = 0; i < holeCount; i++) {
      var left = -d / 2 + w;
      var top = 0.0 + d + 2 * d * (i);
      var right = left + d;
      var bottom = top + d;
      path.addArc(Rect.fromLTRB(left, top, right, bottom), pi / 2, pi);
    }
  }

  @override
  void paint(Canvas canvas, Rect rect, {TextDirection textDirection}) {
    var paint = Paint()
      ..color = color
      ..strokeWidth = 1.5
      ..style = PaintingStyle.stroke
      ..strokeJoin = StrokeJoin.round;
    var d = rect.height / (1 + 2 * holeCount);
    if (dash) {
      _drawDashLine(canvas, Offset(lineRate * rect.width, d / 2),
          rect.height / 16, rect.height - 13, paint);
    } else {
      canvas.drawLine(Offset(lineRate * rect.width, d / 2),
          Offset(lineRate * rect.width, rect.height - d / 2), paint);
    }
  }

  _drawDashLine(
      Canvas canvas, Offset start, double count, double length, Paint paint) {
    var step = length / count / 2;
    for (int i = 0; i < count; i++) {
      var offset = start + Offset(0, 2 * step * i);
      canvas.drawLine(offset, offset + Offset(0, step), paint);
    }
  }

  @override
  ShapeBorder scale(double t) {
    // TODO: implement scale
    return null;
  }
}
三、ClipPath、Card 万物皆可裁剪
1. ClipPath中使用shape
上面主要在Material中使用,ClipPath中也有ShapeBorder的用武之地
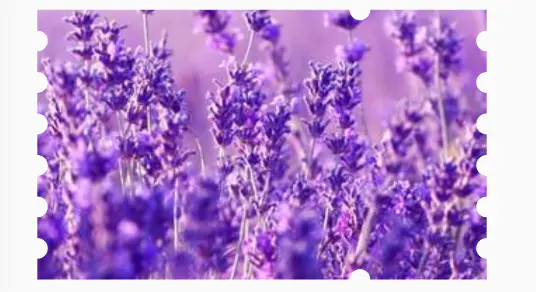
现在我想用优惠券的裁切路径来裁个图片,so easy
  Widget _buildClipPath() {
    return Container(
      width: 300,
      height: 200,
      child: ClipPath(
        clipper: ShapeBorderClipper(
          shape: CouponShapeBorder()
        ),
        child: Image.asset('assets/images/bg.jpeg',fit: BoxFit.cover,),

      ),
    );
  }
2. Card中使用shape
Card是基于Material实现的,可以直接使用shape属性
比如下面的列表题目,可以通过边线来润色一下
没形状
有形状
这篇就到这里吧,只是为你打开了一扇大门,究其核心还是path的操作。
不要让框架限制住你,它仅是最底的基层;在其之上的,应是用创造来筑建的大厦和城楼。
尾声
共同学习,写下你的评论
评论加载中...
作者其他优质文章


