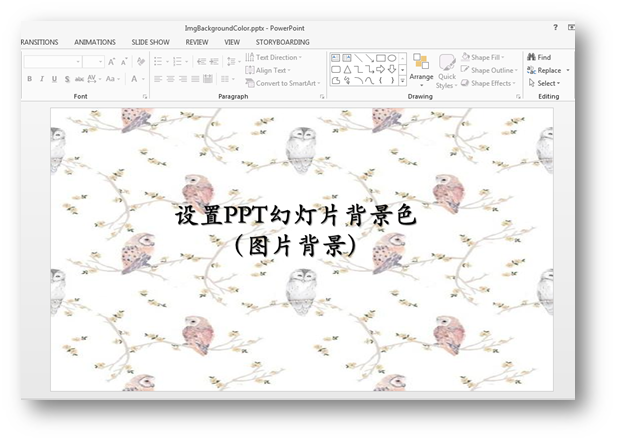
PPT幻灯片生成时,系统默认是无色背景填充,幻灯片设计需要手动设置背景效果,可设置颜色填充或者图片背景填充。本文将对此介绍具体实现方法。
使用工具:Free Spire.Presentation for Java 2.2.3(免费版)
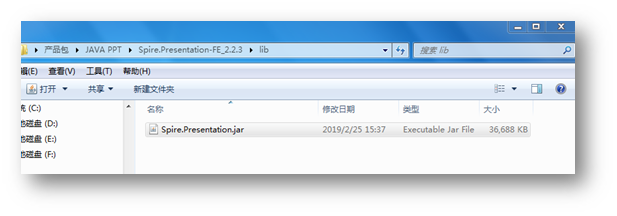
Jar文件导入方法(参考):
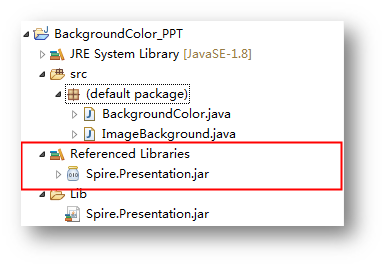
步骤1:在Java程序中可新建一个文件夹命名为Lib,并将下载包中的jar文件复制到新建的文件夹下。
步骤2:复制文件后,添加到引用类库:选中这个jar文件,点击鼠标右键,选择“Build Path” – “Add to Build Path”。完成引用。
Java示例1:设置背景颜色
1.纯色背景
import com.spire.presentation.*;import com.spire.presentation.drawing.*;public class BackgroundColor {
 public static void main(String[] args) throws Exception {

        String inputFile = "sample.pptx";
        String outputFile = "output/setBackgroundColor.pptx";
        Presentation ppt = new Presentation();
        ppt.loadFromFile(inputFile);
        ppt.getSlides().get(0).getSlideBackground().setType(BackgroundType.CUSTOM);        //设置文档的背景填充模式为纯色填充,设置颜色
        ppt.getSlides().get(0).getSlideBackground().getFill().setFillType(FillFormatType.SOLID);
        ppt.getSlides().get(0).getSlideBackground().getFill().getSolidColor().setColor(java.awt.Color.PINK);

        ppt.saveToFile(outputFile, FileFormat.PPTX_2010);
        ppt.dispose();
    }
}
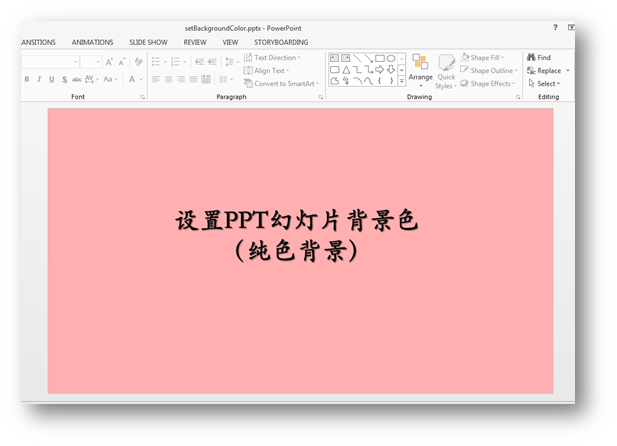
纯色背景效果:
2.渐变背景
import java.awt.Color;import com.spire.presentation.*;
import com.spire.presentation.drawing.*;
public class BackgroundColor {
public static void main(String[] args) throws Exception {
        String inputFile = "test.pptx";
        String outputFile = "output/setBackgroundColor2.pptx";
        Presentation ppt = new Presentation();
        ppt.loadFromFile(inputFile);
        ppt.getSlides().get(0).getSlideBackground().setType(BackgroundType.CUSTOM);       //设置文档的背景填充模式为渐变填充,并设置颜色
        ppt.getSlides().get(0).getSlideBackground().getFill().setFillType(FillFormatType.GRADIENT);
        ppt.getSlides().get(0).getSlideBackground().getFill().getGradient().getGradientStops().append(0, Color.white);
        ppt.getSlides().get(0).getSlideBackground().getFill().getGradient().getGradientStops().append(1,Color.green);
        ppt.saveToFile(outputFile, FileFormat.PPTX_2010);
        ppt.dispose();
    }
}
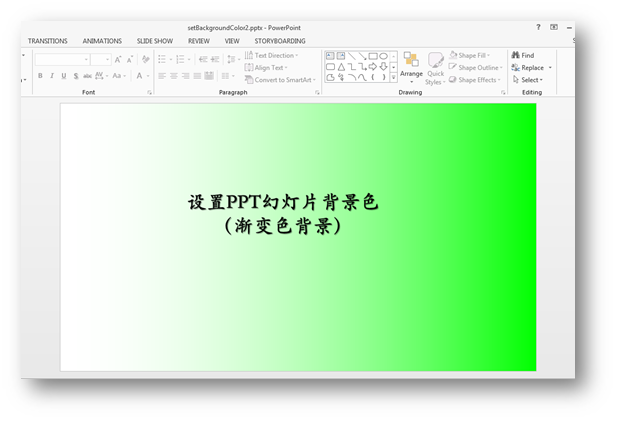
渐变色背景效果:
Java示例2:图片背景
import com.spire.presentation.*;
import com.spire.presentation.drawing.*;
public class ImageBackground {
 public static void main(String[] args) throws Exception {
    String inputFile = "Input.pptx";
    String imageFile = "1.png";
    String outputFile = "output/ImgBackgroundColor.pptx";
    Presentation ppt = new Presentation();
    ppt.loadFromFile(inputFile);
    ppt.getSlides().get(0).getSlideBackground().setType(BackgroundType.CUSTOM);    //设置文档的背景填充模式为图片填充
    ppt.getSlides().get(0).getSlideBackground().getFill().setFillType(FillFormatType.PICTURE);
    ppt.getSlides().get(0).getSlideBackground().getFill().getPictureFill().setAlignment(RectangleAlignment.NONE);
    ppt.getSlides().get(0).getSlideBackground().getFill().getPictureFill().setFillType(PictureFillType.STRETCH);
    ppt.getSlides().get(0).getSlideBackground().getFill().getPictureFill().getPicture().setUrl((new java.io.File(imageFile)).getAbsolutePath());
    ppt.saveToFile(outputFile, FileFormat.PPTX_2010);
    ppt.dispose();
  }
}
图片背景效果:
(本文完)
转载请注明出处!
作者:E-iceblue
原文链接:https://www.cnblogs.com/Yesi/p/10489623.html
点击查看更多内容
为 TA 点赞
评论
共同学习,写下你的评论
评论加载中...
作者其他优质文章
正在加载中
感谢您的支持,我会继续努力的~
扫码打赏,你说多少就多少
赞赏金额会直接到老师账户
支付方式
打开微信扫一扫,即可进行扫码打赏哦


