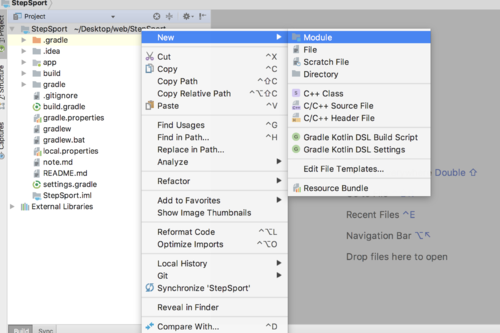
首先我们new 一个Module:
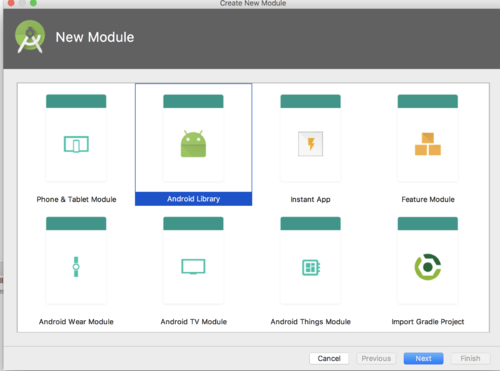
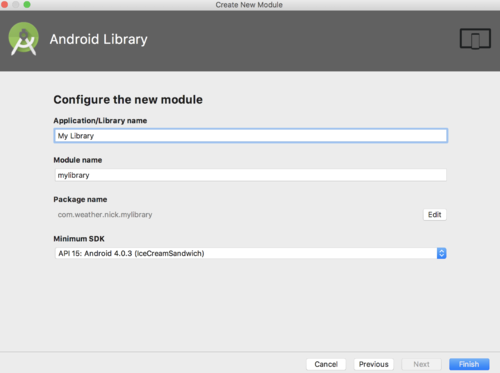
在弹出框中选择Library:
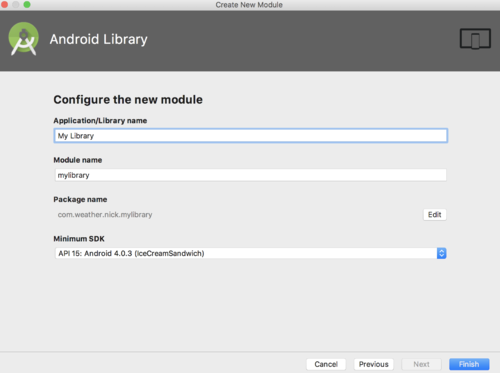
然后press finish:
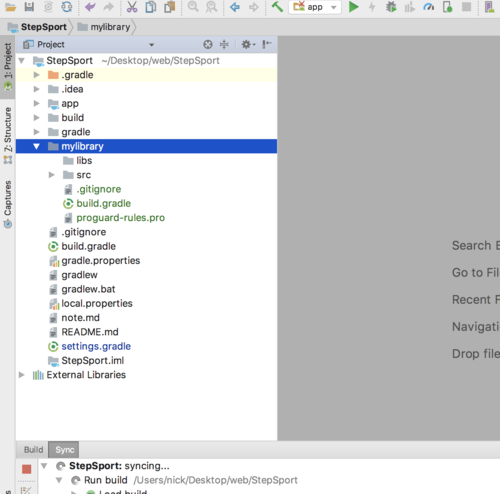
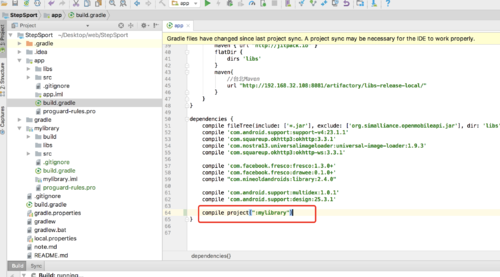
在build.gradle写下面这句话,library就被引用了
compile project(":mylibrary")有一个地方需要特别注意,这个libary的support-v4包的版本可能跟主版本不一样,那么最好改成跟主版本一样,这样不会有编译问题,很多时候编译问题就在于这些包的版本不一样
这个新建立的libary的build.gradle:
apply plugin: 'com.android.library'

android {
    compileSdkVersion 28
    buildToolsVersion "28.0.0"


    defaultConfig {
        minSdkVersion 15
        targetSdkVersion 28
        versionCode 1
        versionName "1.0"

        testInstrumentationRunner "android.support.test.runner.AndroidJUnitRunner"

    }

    buildTypes {
        release {
            minifyEnabled false
            proguardFiles getDefaultProguardFile('proguard-android.txt'), 'proguard-rules.pro'
        }
    }

}

dependencies {
    compile fileTree(dir: 'libs', include: ['*.jar'])
    compile 'com.android.support:support-v4:23.1.1'
    testCompile 'junit:junit:4.12'
    androidTestCompile('com.android.support.test.espresso:espresso-core:3.0.2', {
        exclude group: 'com.android.support', module: 'support-annotations'
    })

}
点击查看更多内容
2人点赞
评论
共同学习,写下你的评论
评论加载中...
作者其他优质文章
正在加载中
感谢您的支持,我会继续努力的~
扫码打赏,你说多少就多少
赞赏金额会直接到老师账户
支付方式
打开微信扫一扫,即可进行扫码打赏哦


