四、Java Beans
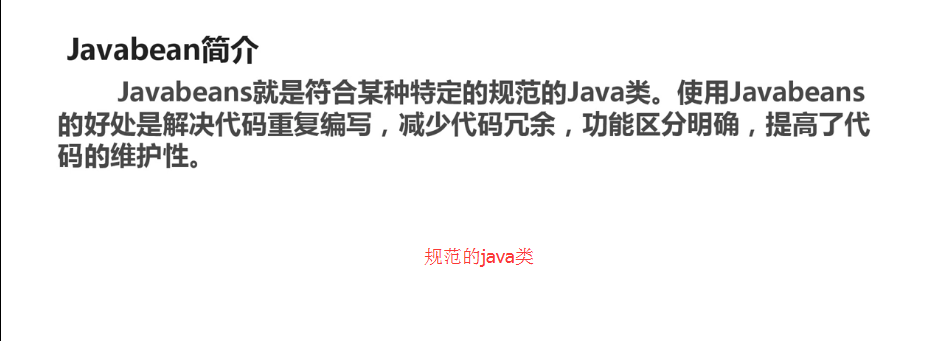
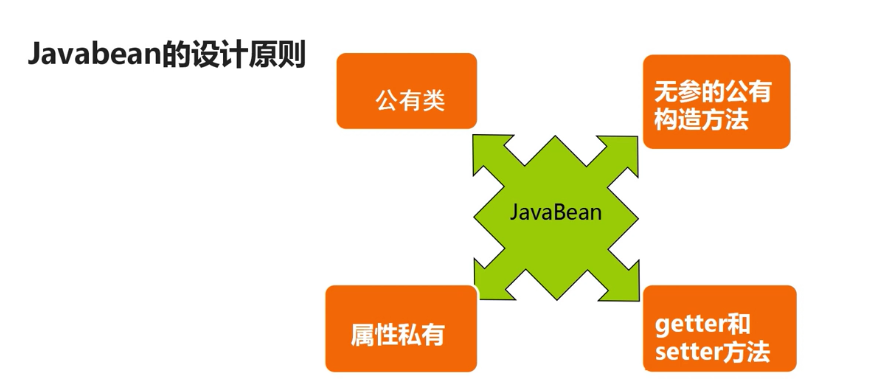
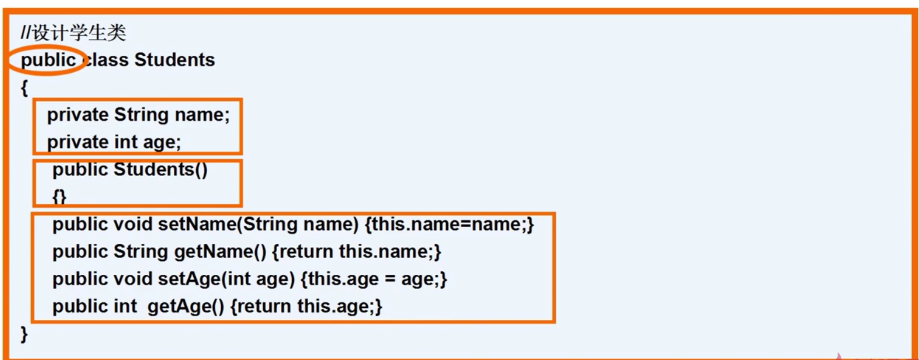
32.JavaBean简介及设计原理
答:详见下图:
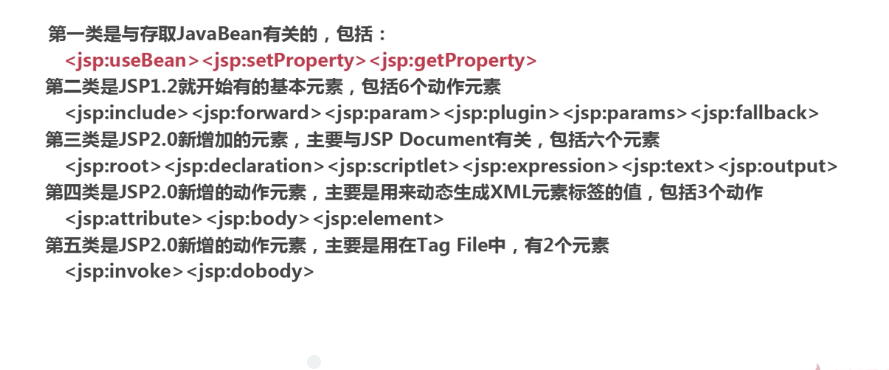
33.什么是JSP动作元素
答:详见下图: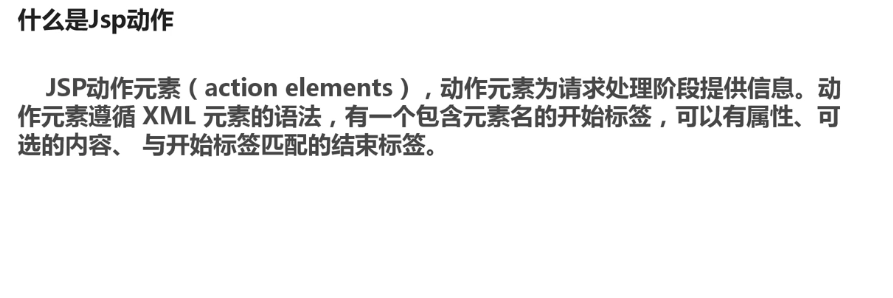
34.什么普通方式应用JavaBean
答: 这样的用法和我们调用普通类一样,只要在jsp页面引入这个类即可用这是在jsp中使用javabean的一种方法,还有一种是jsp动作标签来使用javabean:
这是一个用户类的javabean
public class Users {

    private String username;//用户名
    private String password;//密码

    //保留此默认的构造方法
    public Users()
    {

    }

    public String getUsername() {
        return username;
    }

    public void setUsername(String username) {
        this.username = username;
    }

    public String getPassword() {
        return password;
    }

    public void setPassword(String password) {
        this.password = password;
    }

}
jsp页面调用javabean
<%@ page language="java" import="java.util.*" contentType="text/html; charset=utf-8"%>
<%@ page import="com.po.Users" %>
<%
String path = request.getContextPath();
String basePath = request.getScheme()+"://"+request.getServerName()+":"+request.getServerPort()+path+"/";
%>

<!DOCTYPE HTML PUBLIC "-//W3C//DTD HTML 4.01 Transitional//EN">
<html>
  <head>
    <base href="<%=basePath%>">

    <title>My JSP 'index.jsp' starting page</title>
    <meta http-equiv="pragma" content="no-cache">
    <meta http-equiv="cache-control" content="no-cache">
    <meta http-equiv="expires" content="0">
    <meta http-equiv="keywords" content="keyword1,keyword2,keyword3">
    <meta http-equiv="description" content="This is my page">
    <!--
    <link rel="stylesheet" type="text/css" href="styles.css">
    -->
  </head>

  <body>
    <%
       Users user = new Users();
       user.setUsername("admin"); //设置用户名
       user.setPassword("123456");//设置密码
    %>
    <h1>使用普通方式创建javabean的实例</h1>
    <hr>
       用户名:<%=user.getUsername() %><br>
       密码:<%=user.getPassword() %><br>
  </body>
</html>
35.useBean动作元素
答:详见下图:这里不用调用page指令来引入了:
<%@ page language="java" import="java.util.*" contentType="text/html; charset=utf-8"%>
<%
String path = request.getContextPath();
String basePath = request.getScheme()+"://"+request.getServerName()+":"+request.getServerPort()+path+"/";
%>
<!DOCTYPE HTML PUBLIC "-//W3C//DTD HTML 4.01 Transitional//EN">
<html>
<head>
<base href="<%=basePath%>">
<title>My JSP 'index.jsp' starting page</title>
<meta http-equiv="pragma" content="no-cache">
<meta http-equiv="cache-control" content="no-cache">
<meta http-equiv="expires" content="0">
<meta http-equiv="keywords" content="keyword1,keyword2,keyword3">
<meta http-equiv="description" content="This is my page">
<!--
<link rel="stylesheet" type="text/css" href="styles.css">
-->
</head>
<body>
<jsp:useBean id="myUsers" class="com.po.Users" scope="page"/>
<h1>使用useBean动作创建javabean的实例</h1>
<hr>
用户名:<%=myUsers.getUsername() %><br>
密码:<%=myUsers.getPassword() %><br>
</body>
</html>
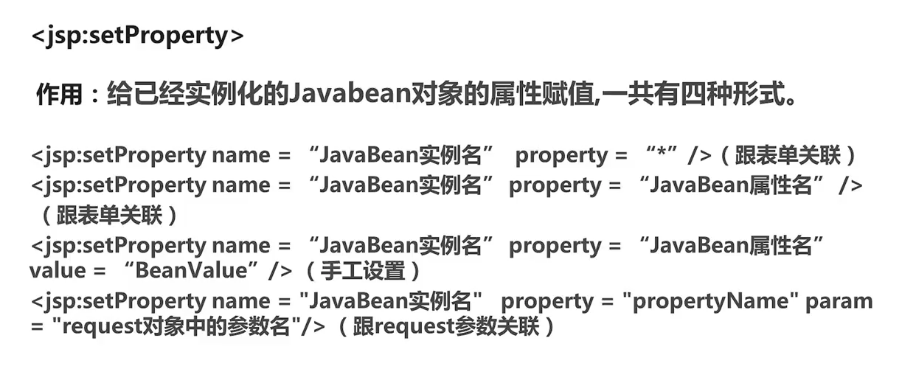
36.setProperty和getPropert
答:详见下图:
从表单中获取数据:
<%@ page language="java" import="java.util.*" contentType="text/html; charset=utf-8" %>
<%
String path = request.getContextPath();
String basePath = request.getScheme()+"://"+request.getServerName()+":"+request.getServerPort()+path+"/";
%>

<!DOCTYPE HTML PUBLIC "-//W3C//DTD HTML 4.01 Transitional//EN">
<html>
  <head>
    <base href="<%=basePath%>">

    <title>My JSP 'login.jsp' starting page</title>

    <meta http-equiv="pragma" content="no-cache">
    <meta http-equiv="cache-control" content="no-cache">
    <meta http-equiv="expires" content="0">
    <meta http-equiv="keywords" content="keyword1,keyword2,keyword3">
    <meta http-equiv="description" content="This is my page">
    <!--
    <link rel="stylesheet" type="text/css" href="styles.css">
    -->

  </head>

  <body>
    <h1>系统登录</h1>
    <hr>
    <form name="loginForm" action="dologin.jsp?mypass=999999" method="post">
      <table>
        <tr>
          <td>用户名:</td>
          <td><input type="text" name="username" value=""/></td>
        </tr>
        <tr>
          <td>密码:</td>
          <td><input type="password" name="password" value=""/></td>
        </tr>
        <tr>
          <td colspan="2" align="center"><input type="submit" value="登录"/></td>

        </tr>
      </table>
    </form>
  </body>
</html>
给JavaBean实例赋值和取值:
<%@ page language="java" import="java.util.*" contentType="text/html; charset=utf-8"%>
<%
String path = request.getContextPath();
String basePath = request.getScheme()+"://"+request.getServerName()+":"+request.getServerPort()+path+"/";
%>

<!DOCTYPE HTML PUBLIC "-//W3C//DTD HTML 4.01 Transitional//EN">
<html>
  <head>
    <base href="<%=basePath%>">

    <title>My JSP 'dologin.jsp' starting page</title>

    <meta http-equiv="pragma" content="no-cache">
    <meta http-equiv="cache-control" content="no-cache">
    <meta http-equiv="expires" content="0">
    <meta http-equiv="keywords" content="keyword1,keyword2,keyword3">
    <meta http-equiv="description" content="This is my page">
    <!--
    <link rel="stylesheet" type="text/css" href="styles.css">
    -->

  </head>

  <body>
    <jsp:useBean id="myUsers" class="com.po.Users" scope="page"/>
    <h1>setProperty动作元素</h1>
    <hr>
   <!--根据表单自动匹配所有的属性 -->
   <%--
   <jsp:setProperty name="myUsers" property="*"/>
   --%>
   <!--根据表单匹配所有部分的属性 -->
   <%--
   <jsp:setProperty name="myUsers" property="username"/>
   --%>
   <!--根表单无关,通过手工赋值给属性 -->
   <%--
   <jsp:setProperty name="myUsers" property="username" value="lisi"/>
   <jsp:setProperty name="myUsers" property="password" value="888888"/>
   --%>
   <!--通过URL传参数给属性赋值 -->
   <jsp:setProperty name="myUsers" property="username"/>
   <jsp:setProperty name="myUsers" property="password" param="mypass"/>
   <!-- 使用传统的表达式方式来获取用户名和密码 -->
   <%--
       用户名:<%=myUsers.getUsername() %><br>
       密码:<%=myUsers.getPassword() %><br>
   --%>
   <!-- 使用getProperty方式来获取用户名和密码 -->
      用户名:<jsp:getProperty name="myUsers" property="username"/> <br>
      密码:<jsp:getProperty name="myUsers" property="password"/><br>
   <br>
   <br>
      <a href="testScope.jsp">测试javabean的四个作用域范围</a>
      <%
         request.getRequestDispatcher("testScope.jsp").forward(request, response);
      %>
  </body>
</html>
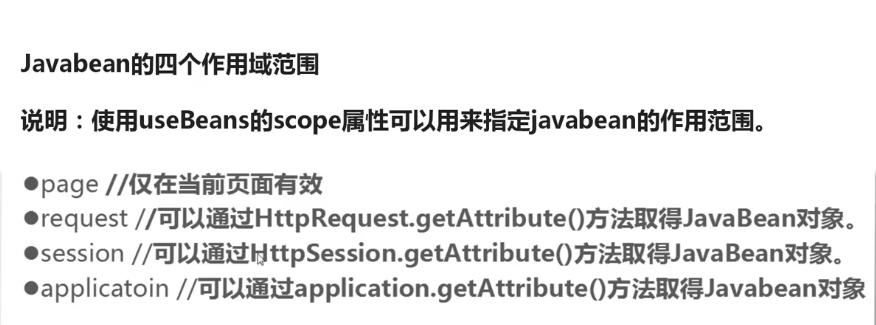
37.JavaBean四个作用范围
答:详见下图:
记得哟是结合上面的例子来的,首先login.jsp—>dologin.jsp(这里指定scope)—>test.jsp(这里指定scope)
<%@ page language="java" import="java.util.*" contentType="text/html; charset=utf-8"%>
<%@ page import="com.po.Users" %>
<%
String path = request.getContextPath();
String basePath = request.getScheme()+"://"+request.getServerName()+":"+request.getServerPort()+path+"/";
%>

<!DOCTYPE HTML PUBLIC "-//W3C//DTD HTML 4.01 Transitional//EN">
<html>
  <head>
    <base href="<%=basePath%>">

    <title>My JSP 'testScope.jsp' starting page</title>

    <meta http-equiv="pragma" content="no-cache">
    <meta http-equiv="cache-control" content="no-cache">
    <meta http-equiv="expires" content="0">
    <meta http-equiv="keywords" content="keyword1,keyword2,keyword3">
    <meta http-equiv="description" content="This is my page">
    <!--
    <link rel="stylesheet" type="text/css" href="styles.css">
    -->

  </head>

  <body>
    <h1>Javabean的四个作用域范围</h1>
    <hr>
    <jsp:useBean id="myUsers" class="com.po.Users" scope="page"/>
       用户名:<jsp:getProperty name="myUsers" property="username"/><br>
       密码:<jsp:getProperty name="myUsers" property="password"/><br>
    <!-- 使用内置对象获取用户名和密码 -->
    <hr>
   <%--
       用户名:<%=((Users)application.getAttribute("myUsers")).getUsername()%><br>
       密码:<%=((Users)application.getAttribute("myUsers")).getPassword() %><br>
   --%>
   <%--
       用户名:<%=((Users)session.getAttribute("myUsers")).getUsername()%><br>
       密码:<%=((Users)session.getAttribute("myUsers")).getPassword() %><br>
   --%>
   <%--
       用户名:<%=((Users)request.getAttribute("myUsers")).getUsername()%><br>
       密码:<%=((Users)request.getAttribute("myUsers")).getPassword() %><br>
   --%>
   <%
       String username = "";
       String password = "";
       if(pageContext.getAttribute("myUsers")!=null )
       {
          username = ((Users)pageContext.getAttribute("myUsers")).getUsername();
          password = ((Users)pageContext.getAttribute("myUsers")).getPassword();
       }

   %>

       用户名:<%=username%><br>
       密码:<%=password%><br>

  </body>
</html>
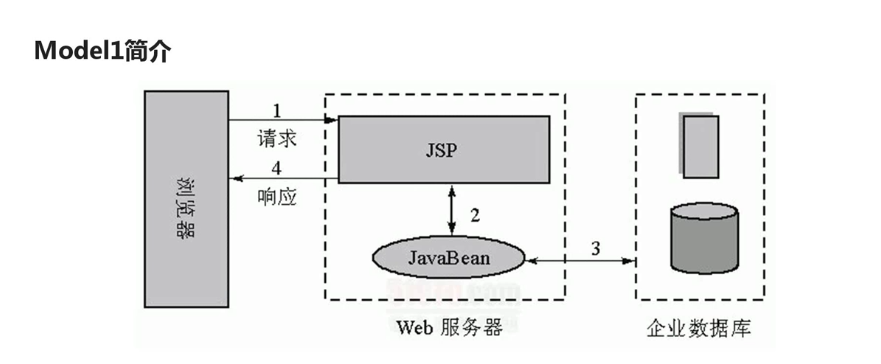
38.Model1介绍
答:详见下图: 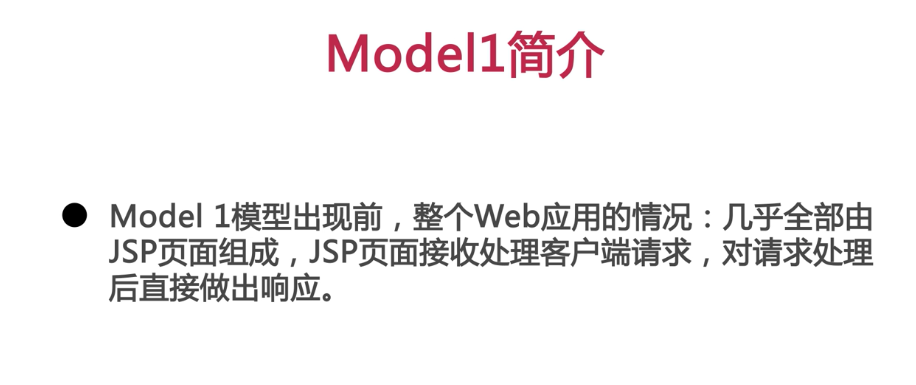


五、JSP状态管理
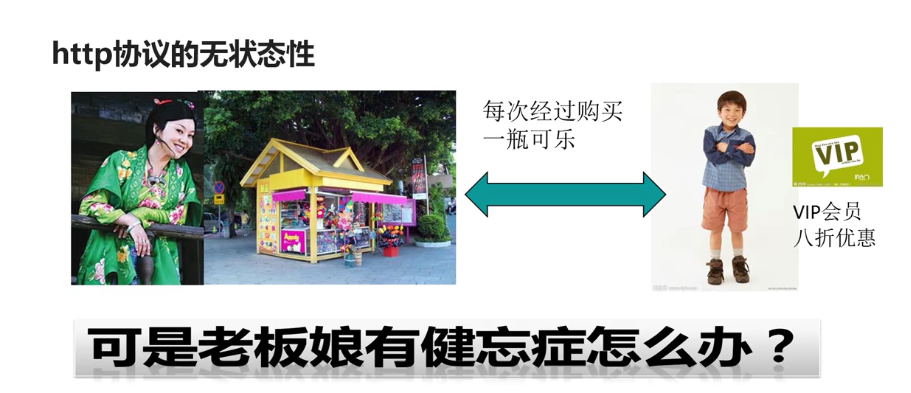
39.http协议的无状态性
答:详见下图: 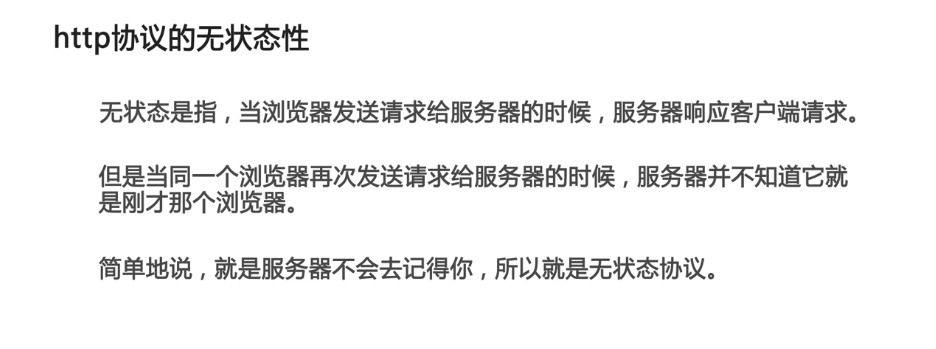
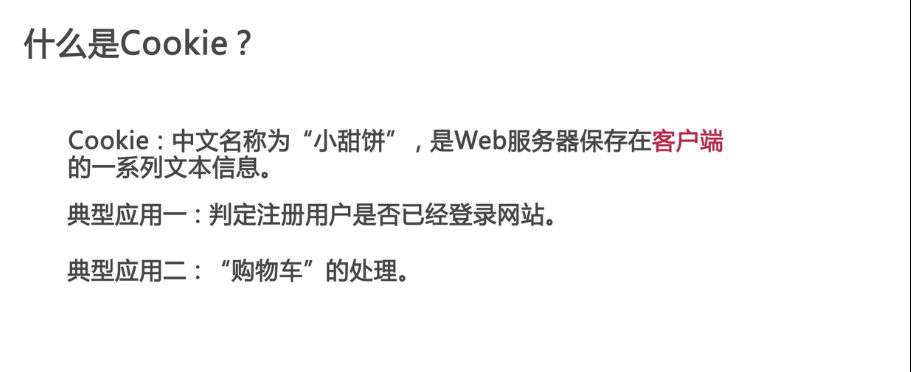
40.Cookie概述
答:详见下图:jsp中用来保存用户状态的两大机制:数据存到服务器Session和数据存到客户端
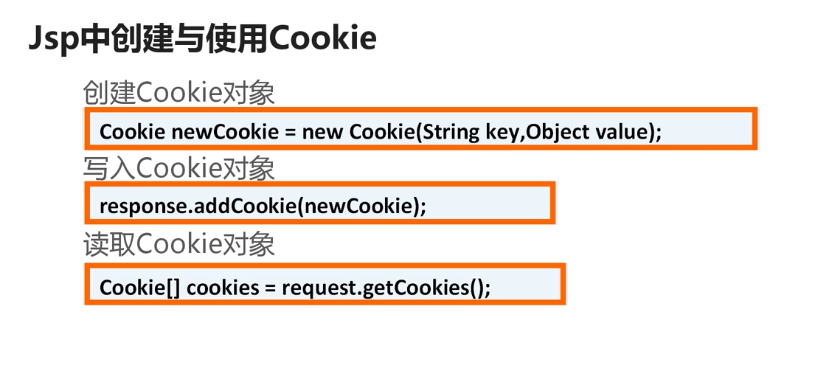
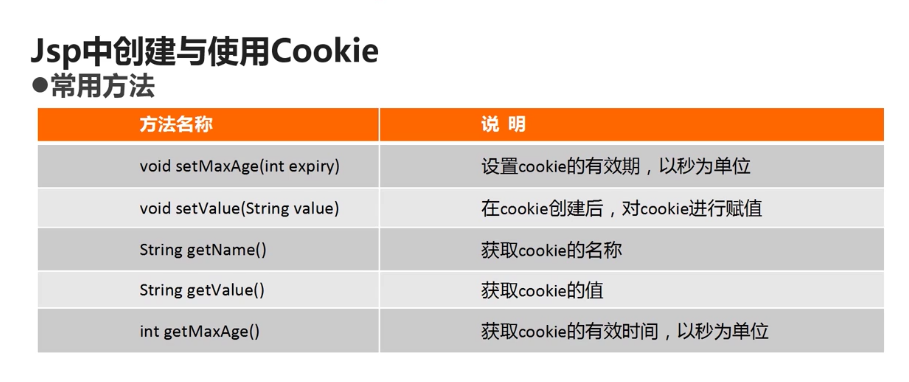
41.JSP页面中创建于使用Cookie
答:
用户登录
<h1>用户登录</h1>
    <hr>
    <%
      request.setCharacterEncoding("utf-8");
      String username="";
      String password = "";
      Cookie[] cookies = request.getCookies();
      if(cookies!=null&&cookies.length>0)
      {
           for(Cookie c:cookies)
           {
              if(c.getName().equals("username"))
              {
                   username =  URLDecoder.decode(c.getValue(),"utf-8");
              }
              if(c.getName().equals("password"))
              {
                   password =  URLDecoder.decode(c.getValue(),"utf-8");//由于c.getValue()获取的是一个字符串,所以要转换类型
              }
           }
      }
    %>
    <form name="loginForm" action="dologin.jsp" method="post">
       <table>
         <tr>
           <td>用户名:</td>
           <td><input type="text" name="username" value="<%=username %>"/></td>
         </tr>
         <tr>
           <td>密码:</td>
           <td><input type="password" name="password" value="<%=password %>" /></td>
         </tr>
         <tr>
           <td colspan="2"><input type="checkbox" name="isUseCookie" checked="checked"/>十天内记住我的登录状态</td>
         </tr>
         <tr>
           <td colspan="2" align="center"><input type="submit" value="登录"/><input type="reset" value="取消"/></td>
         </tr>
       </table>
    </form>
登录成功
  <h1>登录成功</h1>
    <hr>
    <br>
    <br>
    <br>
    <%
       request.setCharacterEncoding("utf-8");
       //首先判断用户是否选择了记住登录状态
       out.print("fuck");
       String[] isUseCookies = request.getParameterValues("isUseCookie");//是否要保存十天,要保存的话就执行相应的逻辑
       if(isUseCookies!=null&&isUseCookies.length>0)
       {
          //把用户名和密码保存在Cookie对象里面
          String username = URLEncoder.encode(request.getParameter("username"),"utf-8");
          //使用URLEncoder解决无法在Cookie当中保存中文字符串问题
          String password = URLEncoder.encode(request.getParameter("password"),"utf-8");

          Cookie usernameCookie = new Cookie("username",username);
          Cookie passwordCookie = new Cookie("password",password);
          usernameCookie.setMaxAge(864000);
          passwordCookie.setMaxAge(864000);//设置最大生存期限为10天(10*24*60*60)
          response.addCookie(usernameCookie);//将cookie存到浏览其中,写入cookie
          response.addCookie(passwordCookie);//
       }
       else
       {
          Cookie[] cookies = request.getCookies();
          if(cookies!=null&&cookies.length>0)
          {
             for(Cookie c:cookies)
             {
                if(c.getName().equals("username")c.getName().equals("password"))
                {
                    c.setMaxAge(0); //设置Cookie失效
                    response.addCookie(c); //重新保存。
                }
             }
          }
       }
    %>
    <a href="users.jsp" target="_blank">查看用户信息</a>
用户信息
<h1>用户信息</h1>
    <hr>
    <%
      request.setCharacterEncoding("utf-8");
      String username="";
      String password = "";
      Cookie[] cookies = request.getCookies();//读取cookie
      if(cookies!=null&&cookies.length>0)
      {
           for(Cookie c:cookies)
           {
              if(c.getName().equals("username"))
              {
                   username = URLDecoder.decode(c.getValue(),"utf-8");
              }
              if(c.getName().equals("password"))
              {
                   password = URLDecoder.decode(c.getValue(),"utf-8");
              }
           }
      }
    %>
    <BR>
    <BR>
    <BR>
         用户名:<%=username %><br>
         密码:<%=password %><br>
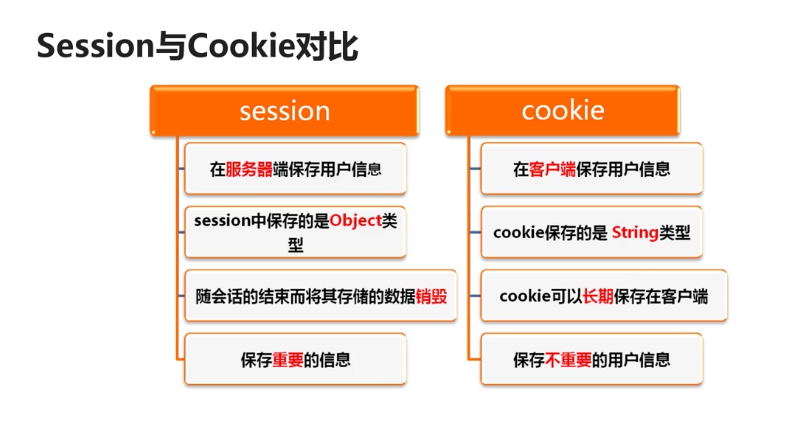
42.Session于Cookie的对比
答:详见下图:首先我来说他们相同点:(1)用来保护用户状态的机制(2)他们都会过期;
下图是不同点
(1)Session是保存到服务器端的内存里,而cookie是以文本文件保存到客户端
(2)保存的类型不一样
具体如下图:
六、JSP指令与动作元素
43.include指令
答:详见下图:我们jsp有3大指令,page指令、include指令、taglib指令
这个就是使用include指令:把某个jsp当做内容放到某个jsp文件里
<%@ include file="date.jsp"%>
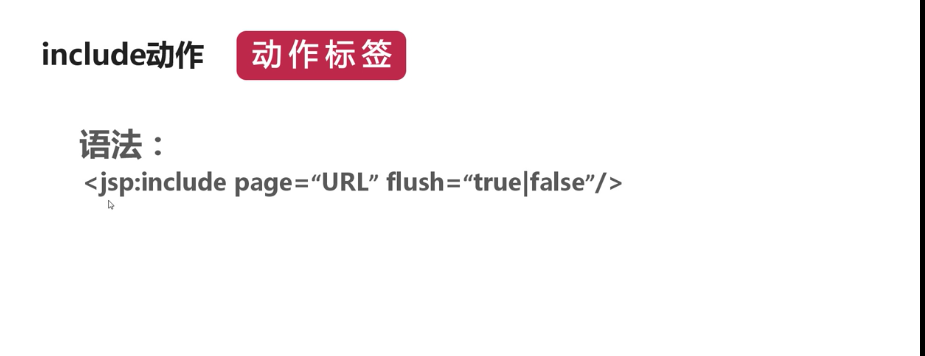
44.include动作
答:详见下图:page属性表示要包含的页面,而flush属性被包含的页面是否从缓冲区读取
这个就是使用include动作:把某个jsp当做内容放到某个jsp文件里
<jsp:include page="date.jsp" flush="false"/>
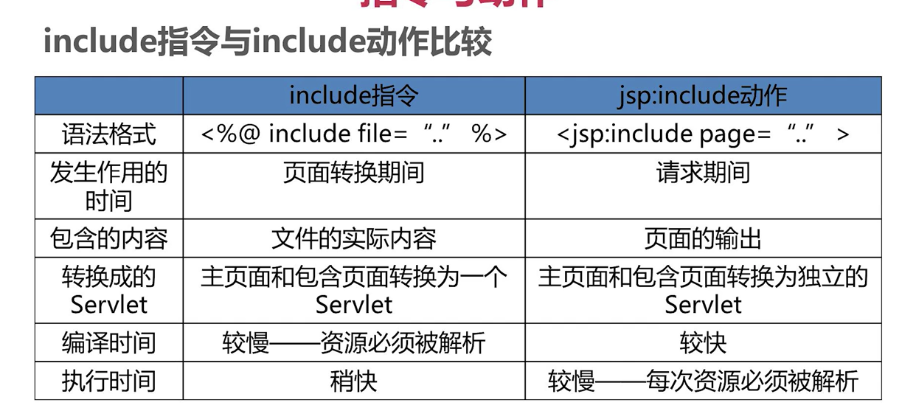
45.include指令与include动作的区别
答:详见下图:include指令包含的是代码,而include动作包含的是结果
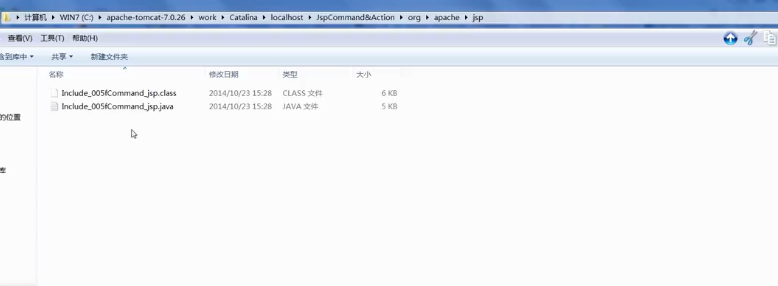
两个jsp页面但只生成一个servlet,也可以所转换成了同一个类(在服务器的work目录)
include动作:也就是说我的这个页面的输出,主的jsp和子的jsp会生成不同的servlet,也就是两个独立的类:
<%@ page language="java" import="java.util.*" contentType="text/html; charset=utf-8"%>
<%@ page import="java.text.*" %>
<%
   Date d = new Date();
   SimpleDateFormat sdf = new SimpleDateFormat("yyyy年MM月dd日");
   String s = sdf.format(d);
   out.println(s);
%>
jsp:include>动作在请求期间被执行,而include指令在编译期页面间被执行
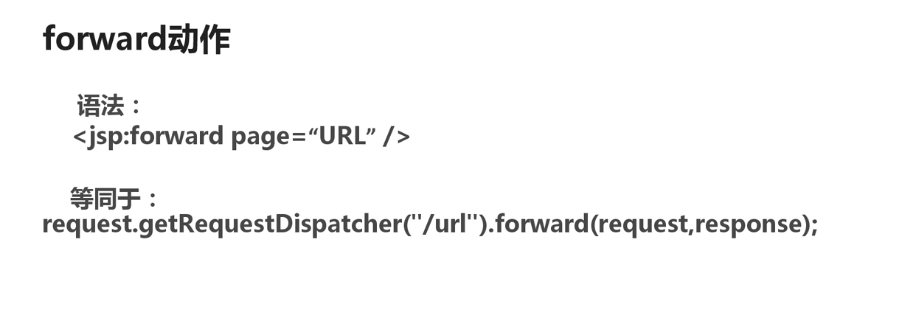
46.forward动作
答:详见下图:这里没有重定向的标签
   <%
       request.getRequestDispatcher("user.jsp").forward(request, response);
    %>
47.param动作
答:详见下图:
doLogin.jsp在转发是我们可以用param动作传值
 <jsp:forward page="user.jsp">
      <jsp:param value="admin@123.net" name="email"/>
      <jsp:param value="888888" name="password"/>
</jsp:forward>共同学习,写下你的评论
评论加载中...
作者其他优质文章


